


You like stunning nails, but do you have time to visit the salon? Are you wondering how to do nail art creatively as a beginner? Luckily, you can do manicure and pedicure at home without professional assistance or complicated tools.
Whether you want a chic look or playful elegance, social media beauty trends can greatly shape DIY nail art designs. High quality nail paint, toothpicks, bobby pins and perseverance allow you to create bold fashion statements through DIY nail art.
We’ve put together five easiest nail art designs that can be easily achieved using random household items as a beginner.
The benefits of DIY nail art for beginners?
Did you know there? Over 395,600 nail technicians all over the world? Technicians style nails, but simple DIY nail art is a more preferred option for beginners looking to increase their skills and confidence at home. Starting with basic designs, you can gradually learn skills before moving on to complex patterns.
So here’s why DIY nail art is perfect for beginners:
- Accessible tools: DIY designs allow you to use ready-to-use items. No expensive nail care tools or specialized skills are required to create beautiful nail art patterns during your home manipedi routine. For example, toothpicks from the kitchen can create stunning polka dots in nail paint.
- DIY nail art doesn’t take time: Most DIY nail art styles are simple and provide easy results. They do not require you to follow the long process, they make it a great solution to enhance your overall look in a few minutes.
- Versatility: Unlike salon styles, nail art DIY allows for flexibility and customization. You can play with your creativity and create a style that matches your unique tastes, mood, personality, outfits and occasions. You can also blend bold and cool colors for your own results.
- DIY isn’t overwhelming: Nail art designs for beginners are basic, adjustable and easy to achieve. Unlike complex patterns, they leave room for practice and improvement. If you don’t like the results, it’s easier to undo and modify simple nail art.
Top 5 Easy Designs for Beginners
There are hundreds of nail art tutorials across the internet without thousands of thousands. It targets people with low skill levels and artistic minds, but choosing the simplest designs to emulate at home is overwhelming.
First, we’ll gather some simple tools like:
- Scotch tape
- Bobby Pin
- Toothpick
- High quality nail paint
Once everything is ready, try out these easy yet decorative DIY nail art ideas and revamp your look.
1. Dotticure Nail Style
If you want a blend of simplicity, elegance and playfulness, polka dots are a timeless option. Dotticure requires dot tools such as Bobby Pins and Tailor’s Pins, creating polka dot clusters of various sizes.
Here are the steps to follow for an eye-catching dotted DIY nail art style:
Step 1: Applying the base coat
Apply a base coat in solid colors, such as white or bold pink. Dry well. A well-dried nail polish is healthier This is because it cannot pollute the air or be absorbed by the body.
Step 2: Place the colour
Place bobby pins, paintbrush tips, or toothpick bead edges in bright colors, such as dark blue, purple, or black, in visually contrasting bright colors. Bobby pins are great for small dots, but the tips of old paintbrushes create a real, pretty polka.
Step 3: Create a polka dot
Lightly apply a color-coated dot tool to create a random polka dot pattern. You can also put dots in a patterned cluster/or spread the dots randomly. For results that look professional, consider changing the color shade and dot size.
Step 4: Apply the top coat
Once dry, apply a top coat, secure the dots, and give the work a sophisticated salon-like sticker. Wait until everything is right before showing off your beautiful polka dotties to your friends.
2. Delicate floral pattern
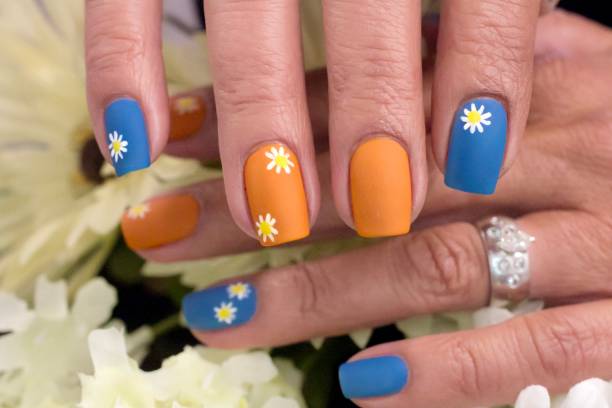
Bring the beauty of natural flowers in your hand with this simple DIY nail art design. It involves creatively painting flower patterns on your nails and achieving a girly, feminine look that emits the goodness of summer.
Step 1: Apply the base coat
Start by applying soft, neutral basecoat colors to create the ideal background. Colors like sky blue and pink will pop your flowers.
Step 2: Create a Flower Center
Use the Priority Dot tool to place the dots as the center of the flower. Contrasting colors work best.
Step 3: Add cluster dots
Add a small dot to the cluster around the center dot. Use a toothpick or super thin brush to drag the dots outward to create beautiful petals. Choose the color of the dots according to the type of flower. For example, place a yellow dot to make sunflower petals.
Step 4: Add top coating
Wait for the flowers to dry out. Add a high quality top coat to make the pattern durable.
3. Stripe/stripe design
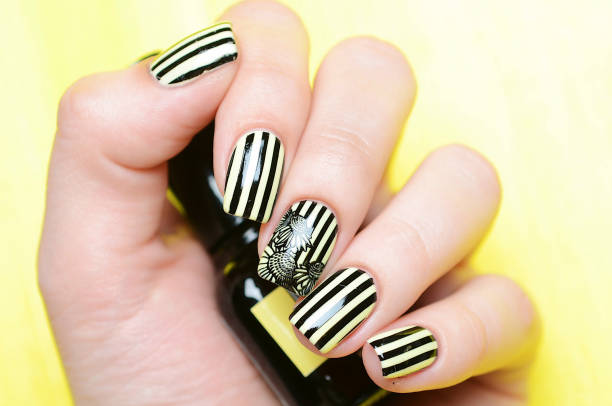
Striped nail art designs are versatile and the easiest to create. With cellophane or scotch tape and your favorite nail polish colors, you can change your nail game in minutes! Also, thin brushes are useful when creating artistic horizontal, zigzag, or vertical lines on your nails.
Here’s how:
Step 1: Apply the base coat
Apply the preferred base coat. Nude colors, baby blue or pastel pink work best. Let the coat dry.
Step 2: Put a thin tape strip
Place a thin tape strip over the basecoat, depending on whether you want a vertical or horizontal stripe.
Step 3: Apply contrasting nail polish
Choose a contrasting nail polish color and apply it to the tape. For example, if the background is black, try painting it white. Wait for it to dry, but not too dry.
Step 4: Remove the tape strip
Gently remove the tape. For elaborate patterns, make sure the paint doesn’t dry out too much. Tape keeps the lines straight and is ideal for creating geometric shapes.
Step 5: Add a top coat
Seal your DIY style with a top coat to give it a perfect finish.
4. Rainbow Kittles (Random Rainbow)
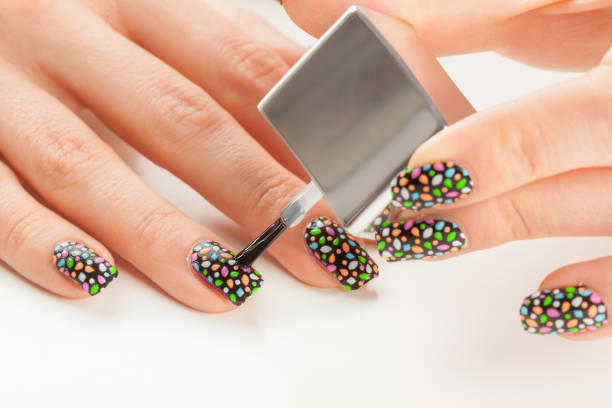
This simple DIY nail art design offers a unique pop of rainbow colors. Here you will choose a random nail paint color and apply another to your finger. This color combination creates super cute, beautiful, inconsistent, multicolored nails.
Step-by-Step Tutorial:
Step 1: Get different colors
Collect at least 5 nail paints of different colors.
Step 2: Apply a thin base coat
Next, apply a thin base coat. Give it time to dry.
Step 3: Apply different colors
Apply a different colored light coat on each finger. Once it’s dry, add another thin coat to all your fingers. Apply two thin coats instead of one thick coat and your nail polish will be faster.
Step 4: Seal the coat
Finally, seal with a colorless top coat for durability.
5. Classic French manicure
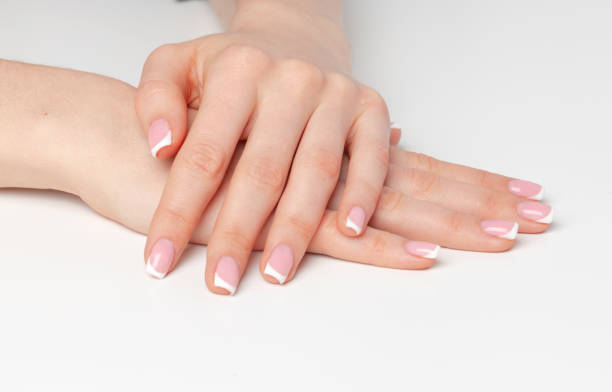
While it may seem refined, the classic French manicure is one of the easiest nail art des for beginners. This includes applying one color to the base of the nail and adding another shade to the tip. So far, white is the most popular color in French groomed tips, but don’t be embarrassed to try other colors.
Step-by-step tutorial:
Step 1: Apply the base coat
Apply the nails with a base coat to protect them. Let it dry.
Step 2: Cover the nail base
Use cellophane tape to cover the bottom of the nail. Please don’t touch on any hints.
Step 3: Apply polish to the tip of the nail
Apply a white nail polish to the exposed edges of your nails. Carefully remove the tape and allow the Polish to dry.
Step 4: Add a top coat
Once dried, seal with a layer of topcoat to give it extra shine.
Are you ready for DIY nail art?
The convenience of home nail polish and pedicure is unparalleled. With so much inspiration from social media and beauty websites, DIY nail art is becoming a viable option for many. This is because everyone can achieve that without the previous nail styling experience.
You only need patience, patience, nail polish and simple home tools to transform your nails from boring to stunning. Whether you want to change the look or plan a photo shoot for your future Instagram personal branding, our detailed list of simple DIY nail art designs for beginners will sort you.
Source: Cosset Moi – www.cossetmoi.com

