


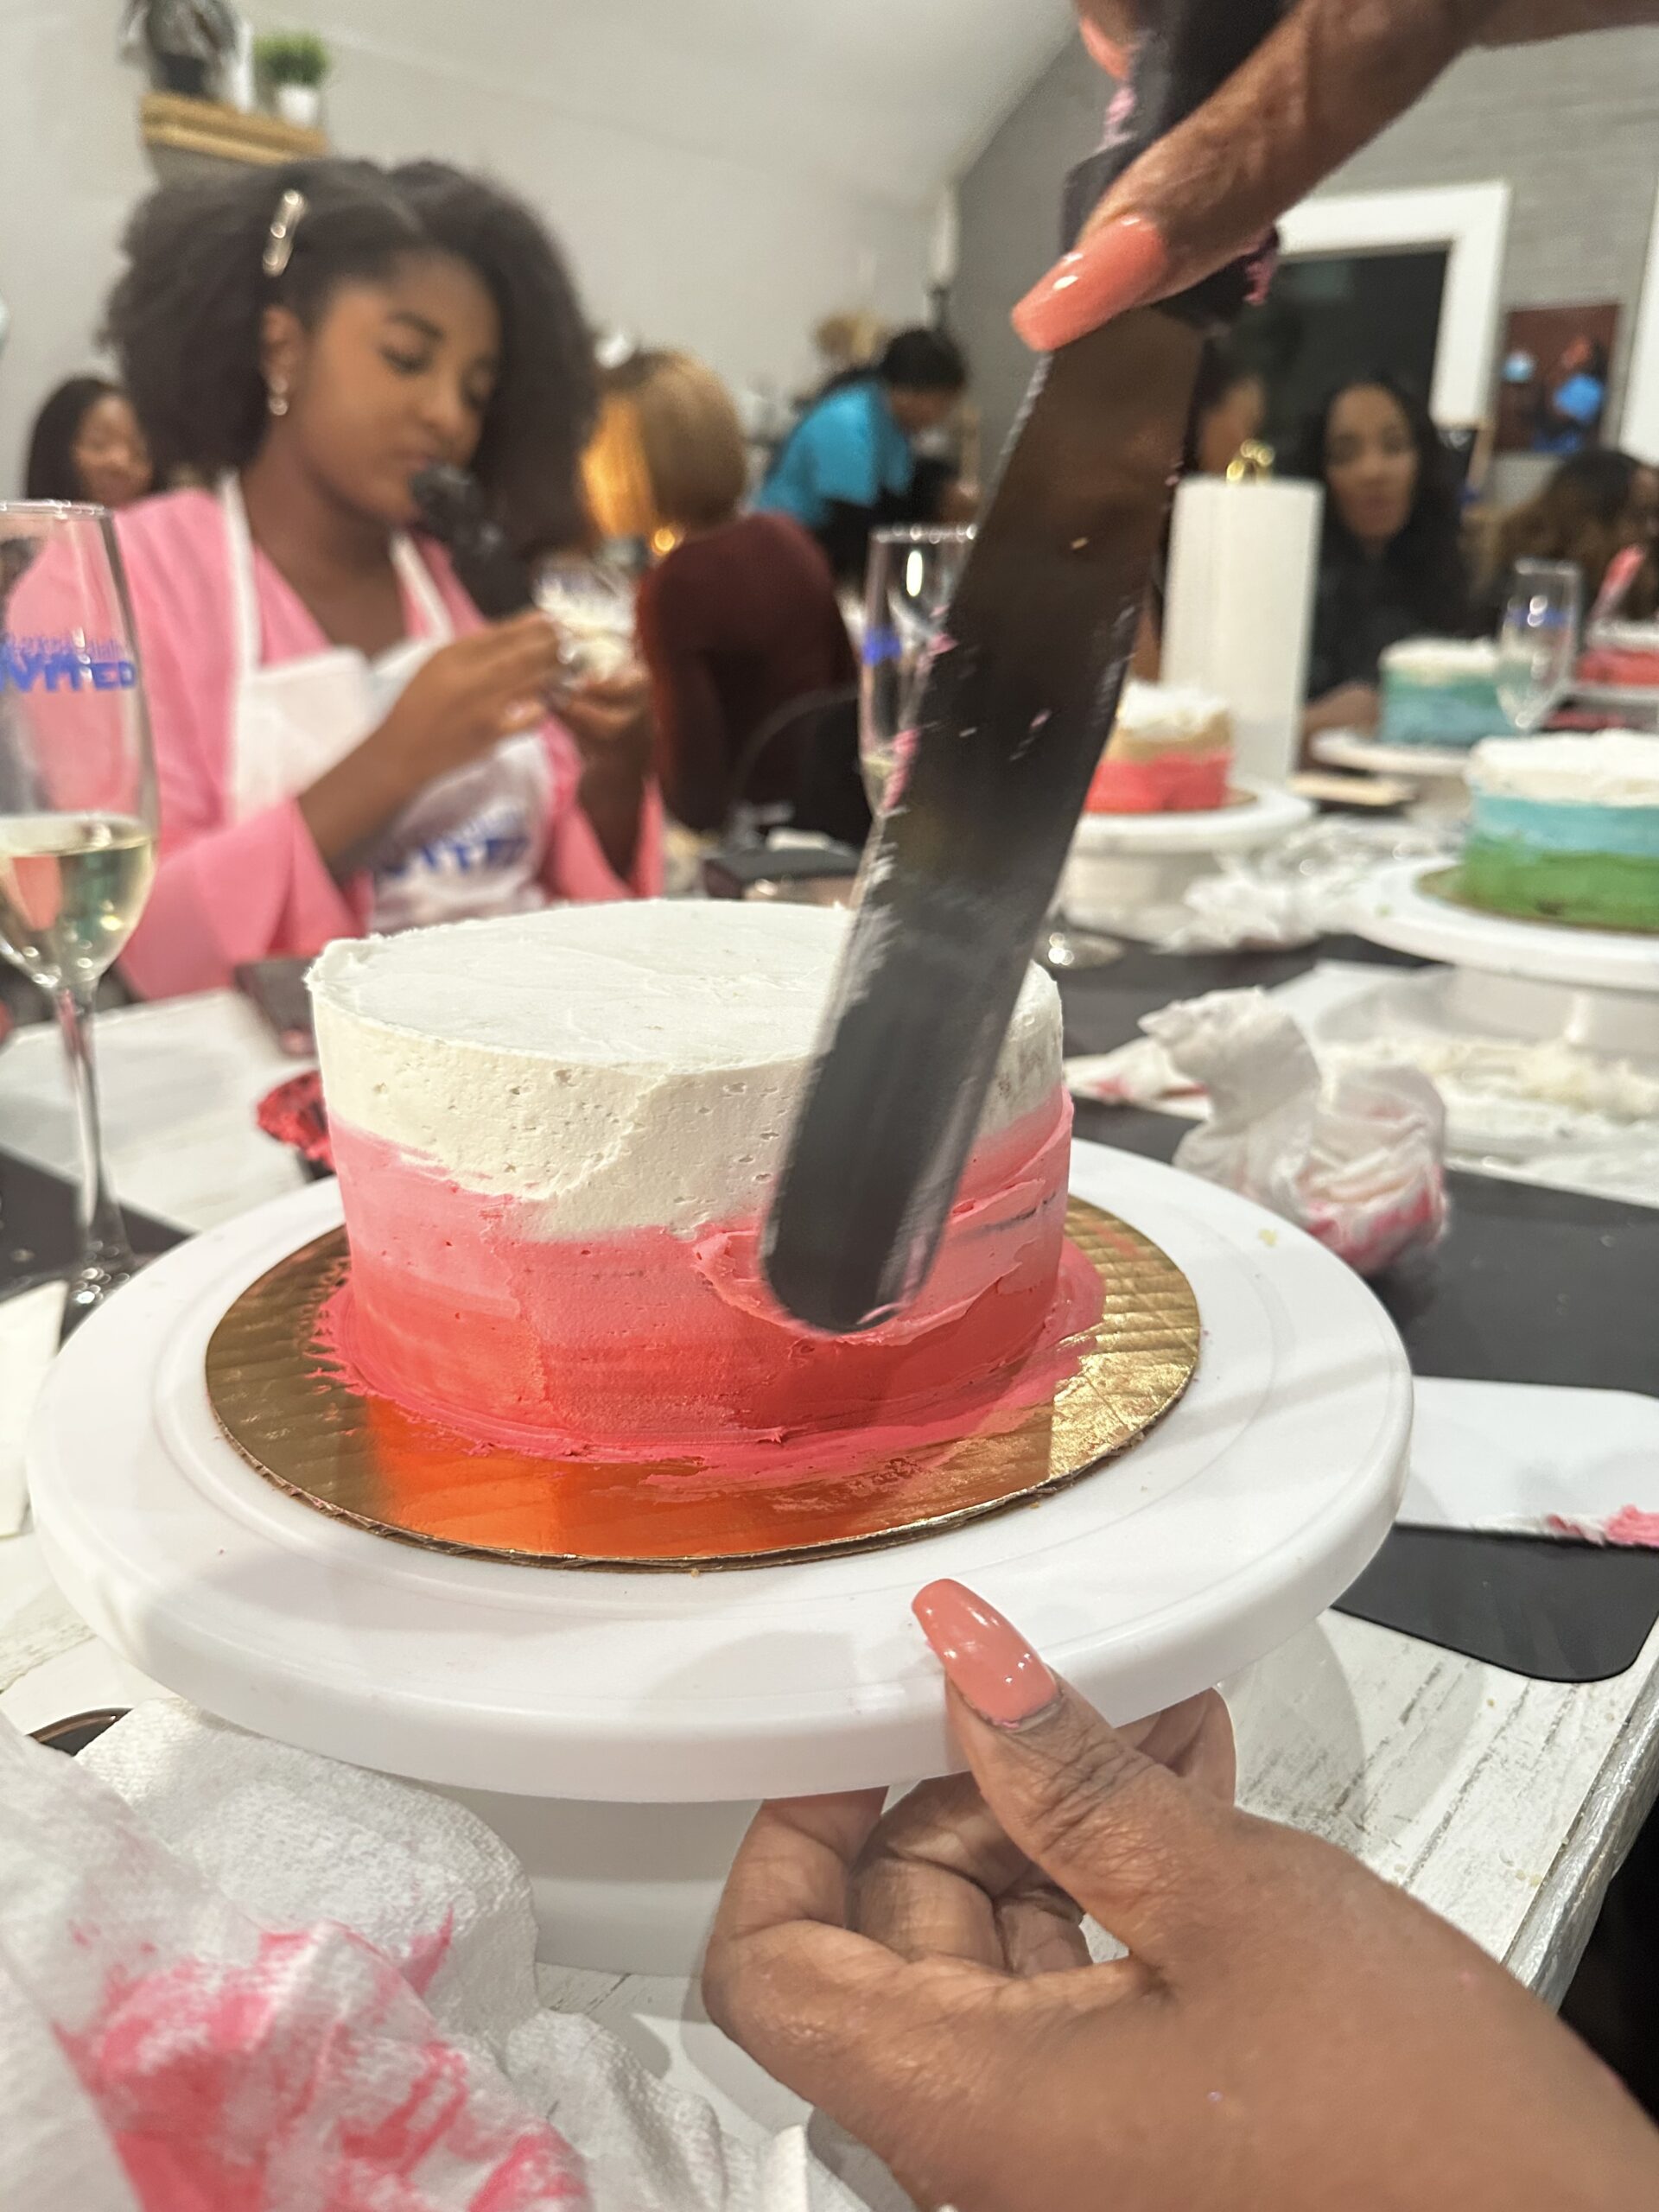
I recently participated in Atlanta’s fun cake decoration class, which was such an explosion! The instructor taught me how to create a trend, the currently trendy. After she walked to us, it seemed very simple, and I was really happy with what my cake was! I can’t wait to share a simple procedure to make myself!
Creating a perfect on -ble cake is a fun and rewarding baking project! This is a gradual guide that helps achieve a stunning gradation effect.
material:
-In the case of a cake:
-2½’s all -purpose flour
-1½ cup granulated sugar
-1 tablespoon baking powder
-A teaspoon salt
-1 cup of salt -free butter, softening
-1 1 cup milk (overall or butter milk)
-4 big eggs
-Banilla extract of 2 teaspoons
-Gelfood coloring of the desired color (for onble effects)
-For frosting:
-1 cup of salt -free butter, softening
-4 cups of powdered sugar
-2 to 3 tablespoons (for consistency)
-Banilla extract of 2 teaspoons
-Gelfood coloring (to match the color of the cake)
Device:
-Mixing bowl
-A electric mixer
-Cup and spoon measurement
-Cake bread (3 or 4 rounds)
-Field spatula
-Piping bag (optional)
-Cake turtle table (optional)
-Cooled racks
Instructions:
Step 1: Prepare the cake batter
1. Pre -heating the oven: preheat the oven to 350 ° F (175 ° C). Grease and flour of cake flipan.
2. Mix the dried ingredients: In the bowl, foam flour, baking powder and salt together.
3. Cream butter and sugar: ** A large mixing bowl, cream (about 3 to 5 minutes) with soft butter and granular sugar lightly and fluffy.
4. Add eggs and vanilla: Add the eggs at a time, mix well each time you add, and stir the vanilla extract.
5. Combine the ingredients: Add the dried material and milk alternately, start with dried material. Mix until mixed.
Step 2: Divide the batter and color
6. Divide the batter: divide the batter into three or four bowls (depending on the number of colors required).
7. Batter color: ** Add the color of gelfood to each bowl, start with the brightest color in one bowl, gradually add gel, and create dark shades in the subsequent bowl. Mix well and distribute the color evenly.
Step 3: Bake the cake
8. Layer and bake: Pour the batters of each color into your prepared cake bread. Bake for 25-30 minutes or the toothpick inserted in the center. Cool with bread for 10 minutes before transferring to the cooling rack and completely cooled.
Step 4: Prepare the frosting
9. Make matte: In a large bowl, hit the soft butter until it becomes creamy. Add the powdered sugar gradually, mix at low speeds until the bond, increase the speed and hit it until it becomes fluffy. Add milk and vanilla to achieve desirable consistency.
10. Color the frosting: Divide the frosting into a separate bowl, color it, and create a gradient effect according to the cake layer.
Step 5: Assemble the cake
11. Cake level: When the cake layer is completely cool, use a serrated knife to level the upper part if necessary.
12. Layer and Frost: Start with the darkest layer at the bottom and place it on the cake stand or plate. Spread a thin layer on the top and stack the next light layer. Continue this process until all layers are piled up from the darkest to the brightest.
13. Put the outside into frost: Apply bread crumbs coat (thin layer) to the entire cake to seal the bread crumbs. Refrigerate for about 30 minutes. Next, cover the outside of the cake with plenty of frost with a matte matte.
Step 6: Decorate
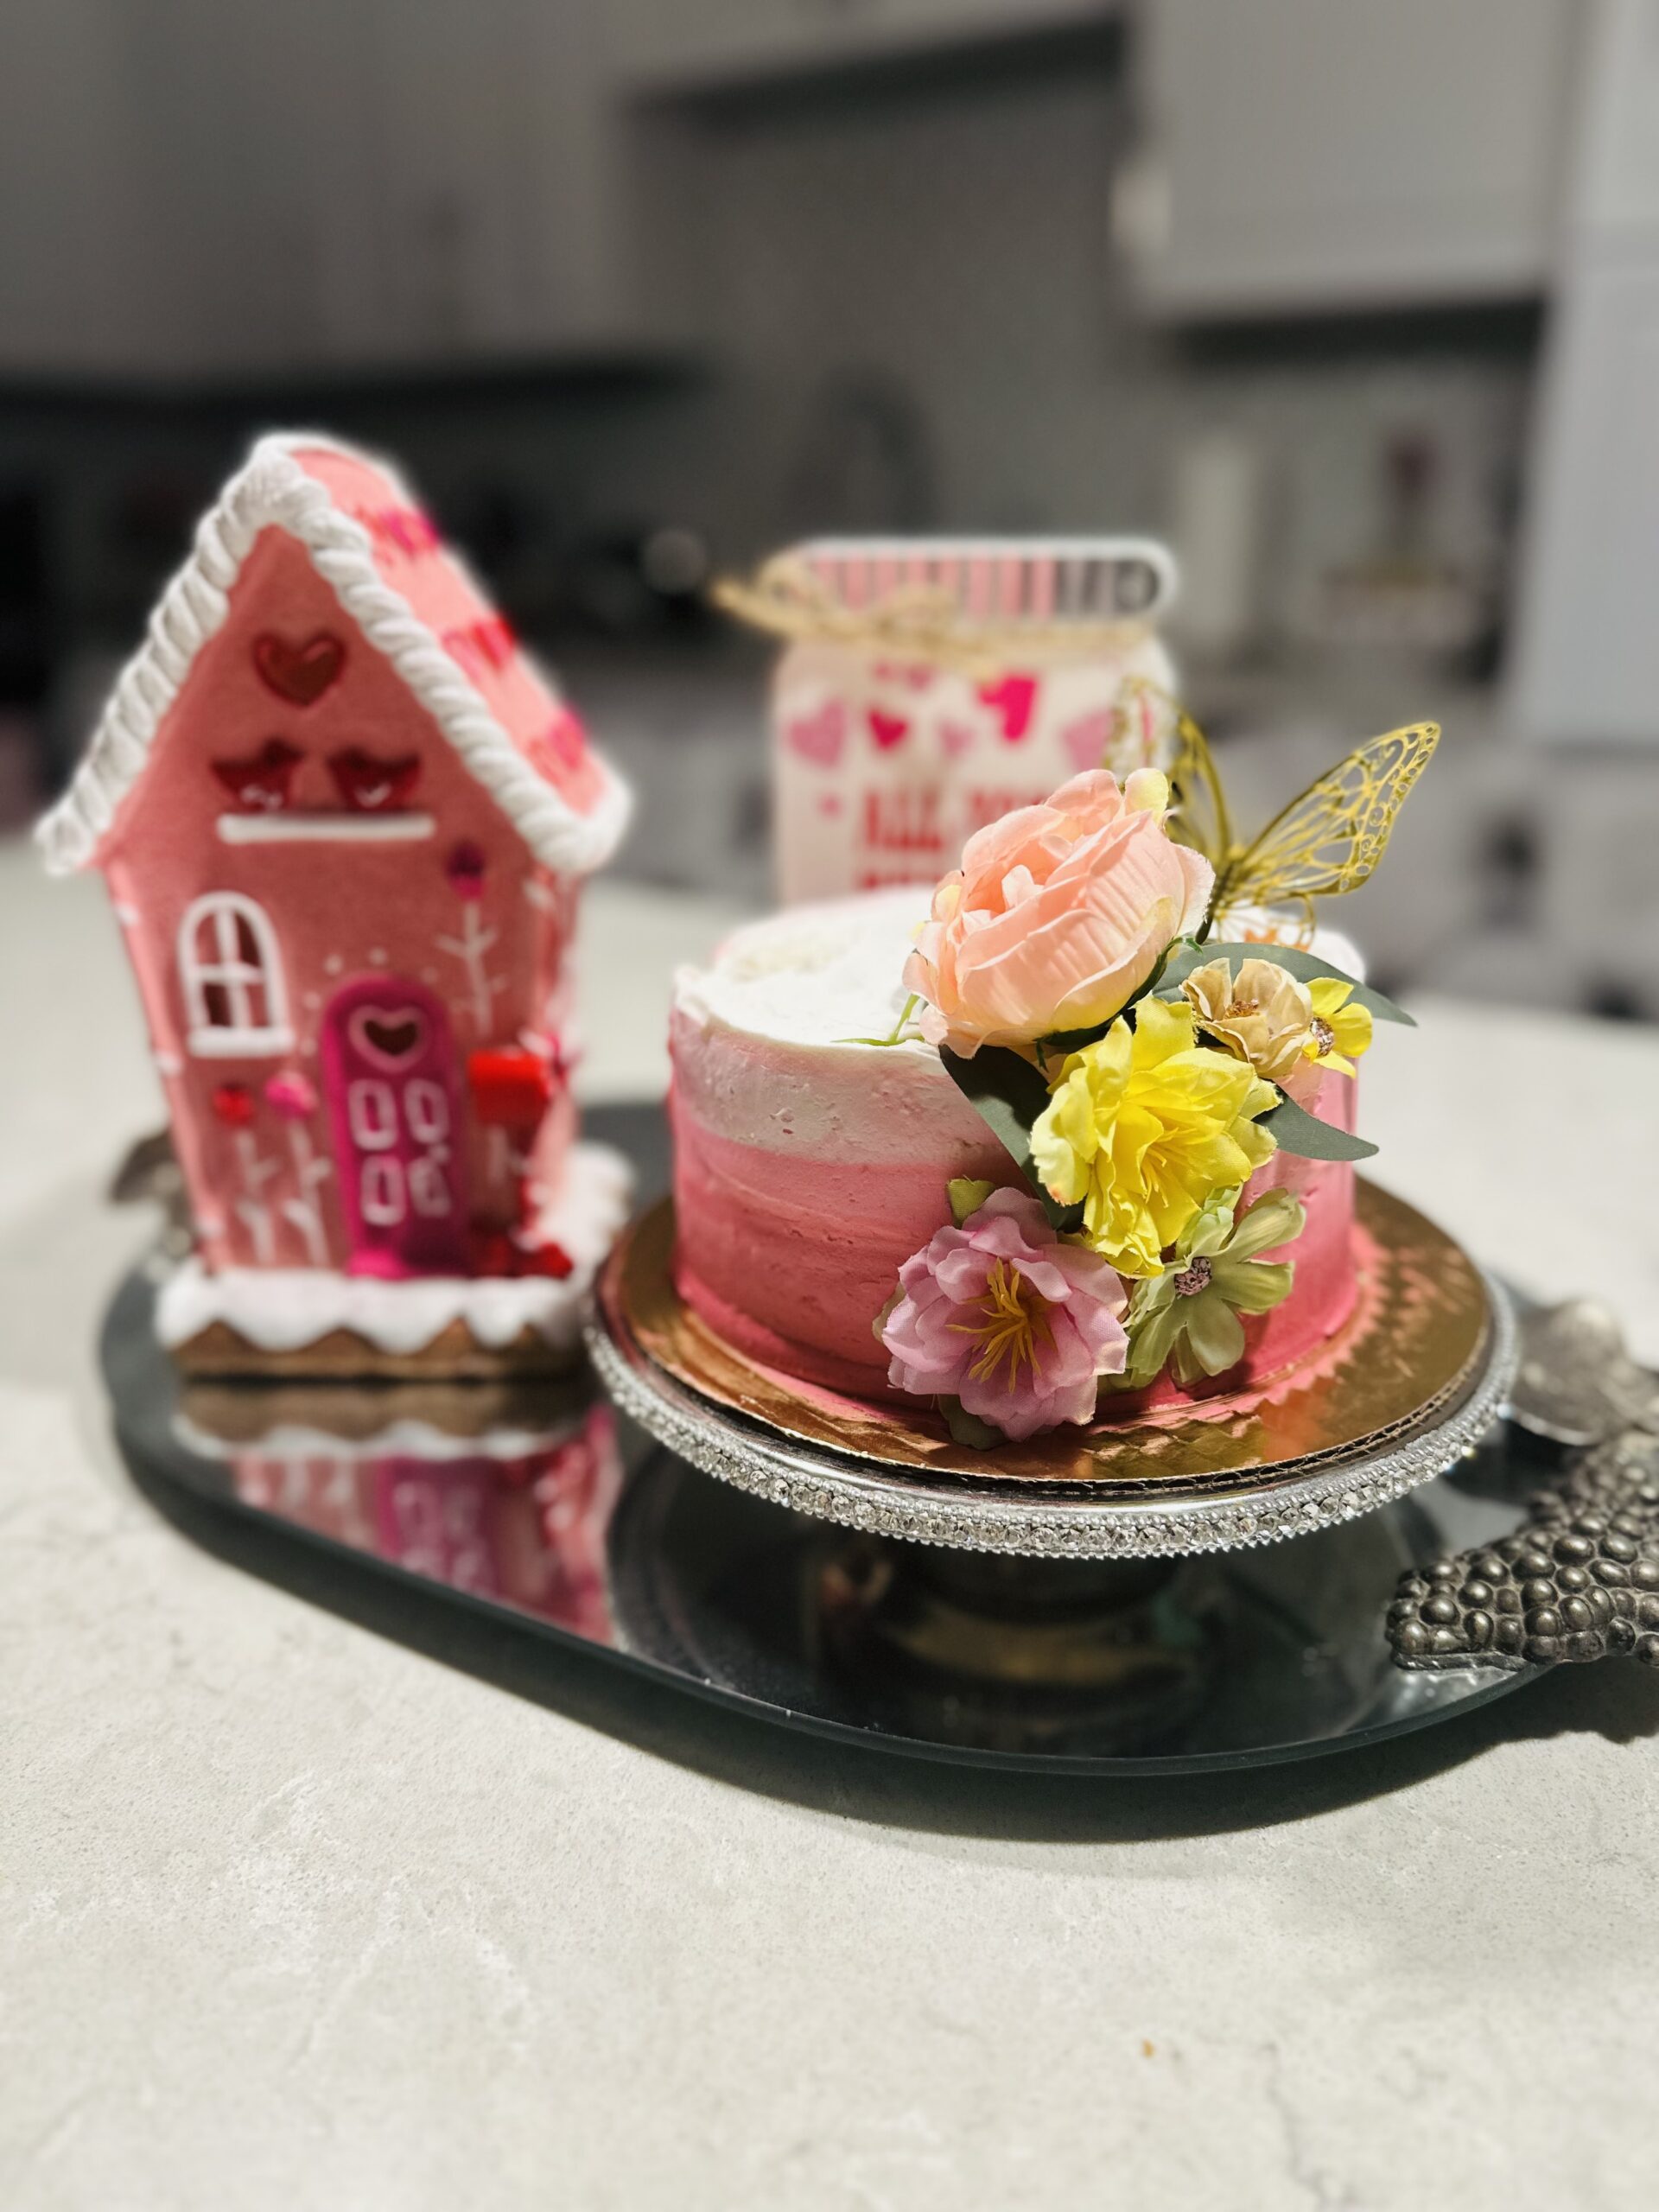
14. Decorate with smooth: Use an offset spatula or bench skirver to smooth the matte. To enhance the onble effect, you can add decorative elements such as sprinkles, edible glitter, and fresh flowers.
Step 7: Serve
15. Slice and enjoy: After decorating, slice the cake and serve! Your guests are surprised at the beautiful onble design.
Hint:
-The high -quality gel food coloring to provide vivid colors without changing the consistency of the cake.
-Since the temperature of the oven may be different, you will be patient with the baking time. Always check the donness with a toothpick.
-Please enjoy this technique. It is an experiment of various colors and frosting design!
Using these steps is not only visually stunning, but also a delicious and beautiful Onble cake. Happy baking!
comment
Source: Talking With Tami – www.talkingwithtami.com

