


When it comes to nail designs, the Ombre option has been its own popularity next to full-color and classic French chips for decades. You can choose a color gradient palette that features bold or neon colors as easily as soft muted ones. This will allow you to make the vibrator bold or subtle.
When it comes to doing your own DIY ombre nails, it’s actually much easier than you might think. We follow easy steps-by-step guides and tutorial videos so you can create your own perfect ombre nail polish without traveling through nail salons. We also have ombre design ideas to inspire your next mani!
Looking for nail art design ideas? Check out these posts for inspiration.

Can I use regular nail polish for my ombre design?
You can try the Ombre Nail method with a regular polish, but as soon as you apply it, the polish starts to dry out, making it difficult to smooth it as smoothly as possible with a gel polish that remains wet until you set it. It’s also great that you can remove any mistakes you make with gel polish with alcohol wipes unless you’ve already set that layer under the lamp, but normal polishes basically require you to put it on unless you try again with your nails.
To try out regular polishes, you’ll need two polish colors, a palette, a sponge brush or make-up sponge, and the layers will dry out while adding more ombre layers. Once finished, set it in a top coat.


1.) Have a home nail polish on your hands and nails and apply two layers of gel base coat and base colour between each coat at the appropriate treatment time (check out this post for step-by-step instructions for doing gel nails at home).
2.) Add a very small amount of the second color to the gel polish palette.


3.) Using a round ombre brush head, tap the polish dots around the palette until the color that will make the palette mark is barely visible. You really want to allow the lightest amount of polish That’s another secret To the amazing ombre… lots very Rather than trying to do it all at once, light layers.
4.) Starting at the tip of the nail, tap the sponge very lightly on the tip of the nail, and proceed at least to the midpoint of the nail (you can go down 2/3 due to the long ombre effect). It should leave a very faint layer of colour, and the goal is to get a very light and very uniform coat in that shade.
If you want to lightly tap the gel polish on your skin, remove it with an alcohol-soaked brush before setting it up. If you’re not satisfied with the layer, you can start again by removing the polish using alcohol and lint-free wipes.


5.) Once you’re satisfied with the layer, place it under light for 30-60 seconds.
6.) Repeat the process again with more gel polish (or continue using what remains in the sponge until it is gone).


7.) Add a top coat, capping the free edges of the nails, and set the amount recommended by Brando Bright (usually 60-90 seconds).
8.) Add cuticle oil to your nails if necessary and enjoy a new ombre nail polish!

Tip: You can perform a vertical gradient (color change from the top of the nail to the bottom of the nail) or a horizontal gradient to change the color from left to right.
How about baby boomer ombre nails?
A popular twist on the classic French manicure, Baby Boomer nail trend uses a base of nude polish and uses an additional ombre effect with a gradation white hint that fades to the bottom of the nail, like the French ombre.
To achieve that look, follow the steps above using a nude base and white in ombre colour.

Ombre Nail Design Ideas:

Winter blue
This ombre baby blue turns into a fresh white polish with this pretty manicure.
The sparkle of the pumpkin
Ombre Center Pumpkin Chrome Nails are the perfect amount of trendy colours.
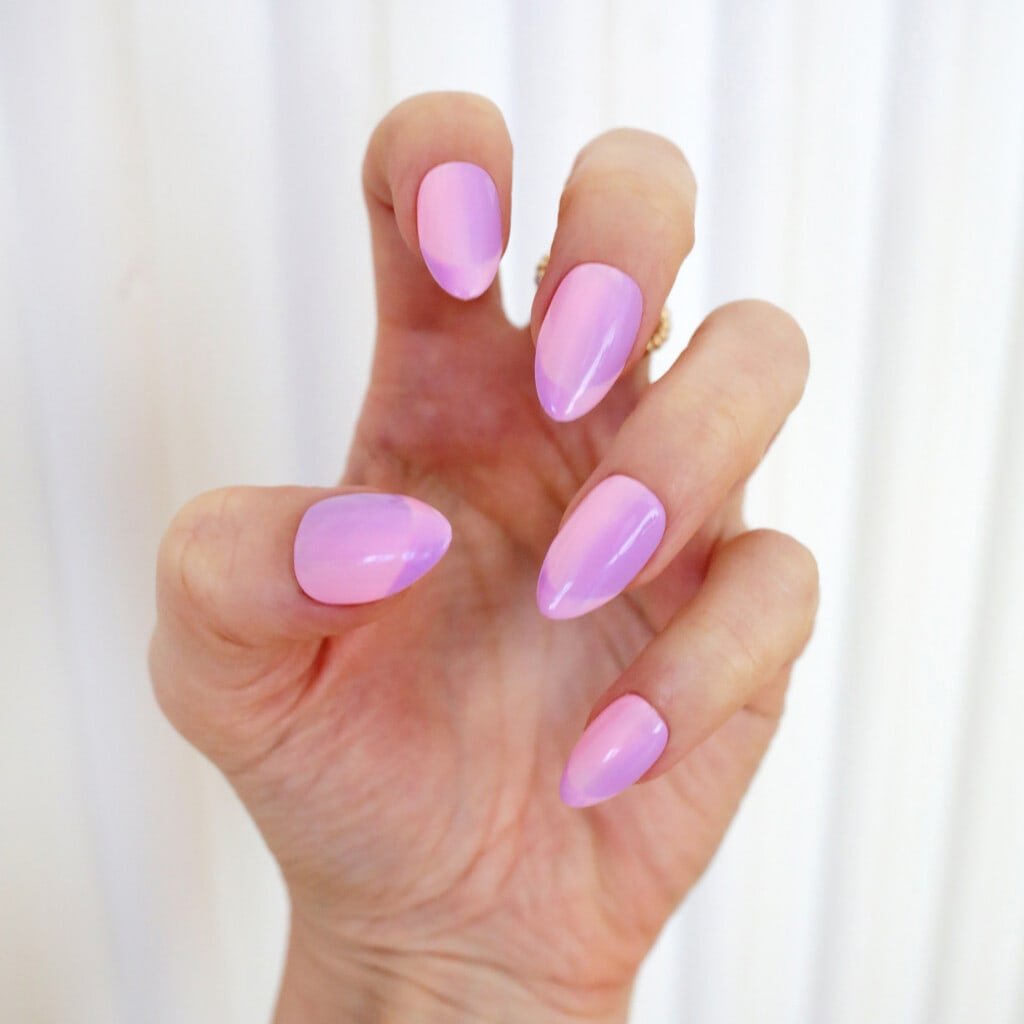
Spring Barbie
Try the hot trends of reverse illusion French nail polish uses ombre shades in perfect pink and purple pastels.

All of that sparkle
These sparkly ombre nails bring just the right amount of sparkle to any outfit.

Sparkle Black French
Adding some ombre sparkles under the black French chip nail polish will give some fun a classic look.

Taupe Ombre
these Taupe Ombre Cat Eye The sparkling claws are neutral, but they come back to life when exposed to light.

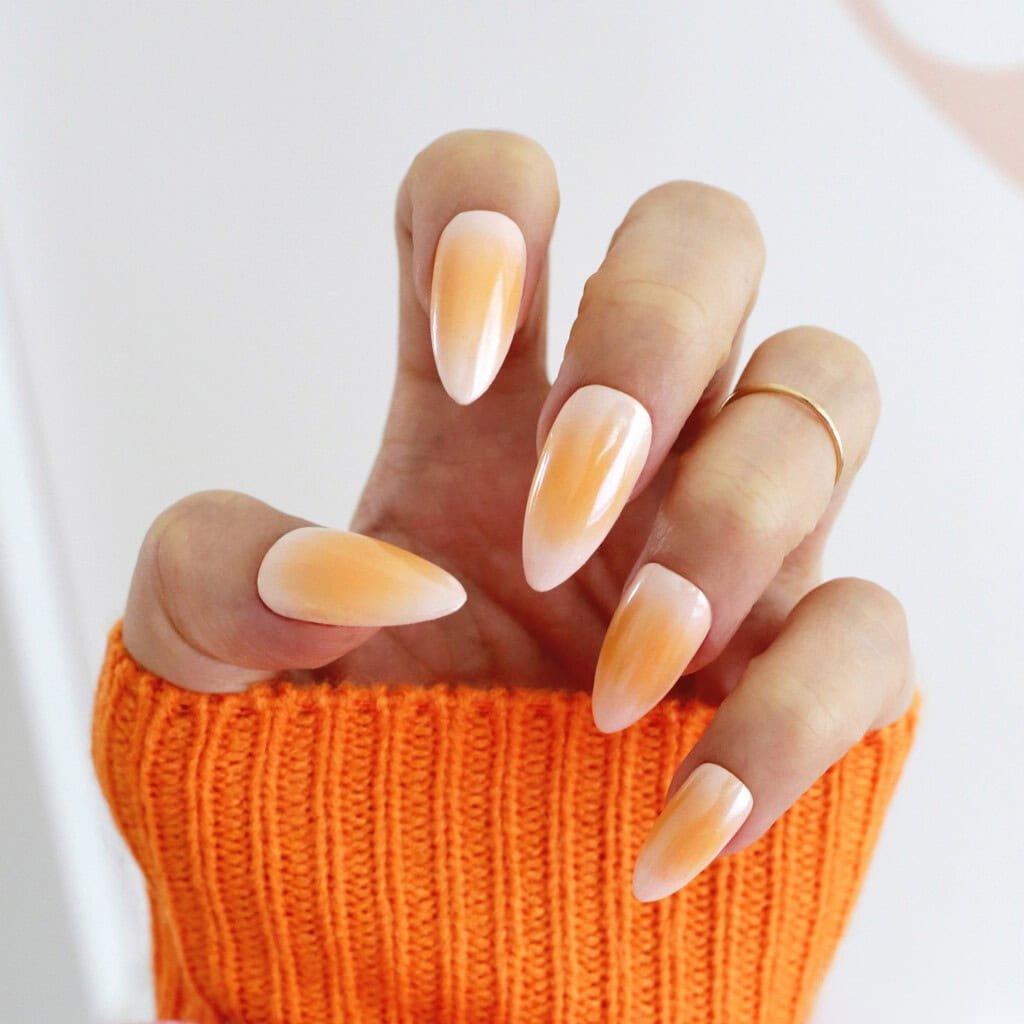
Orange Ombre
Orange ombre nails with layers of black sparkle web are perfect for the fall Halloween season.
Source: A Beautiful Mess – abeautifulmess.com

