


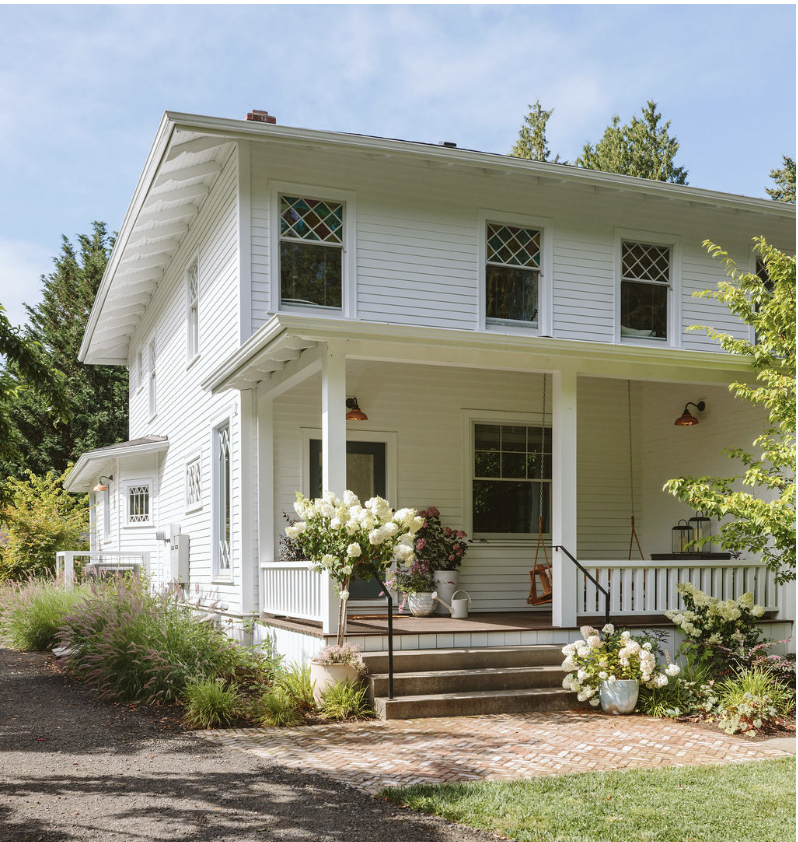
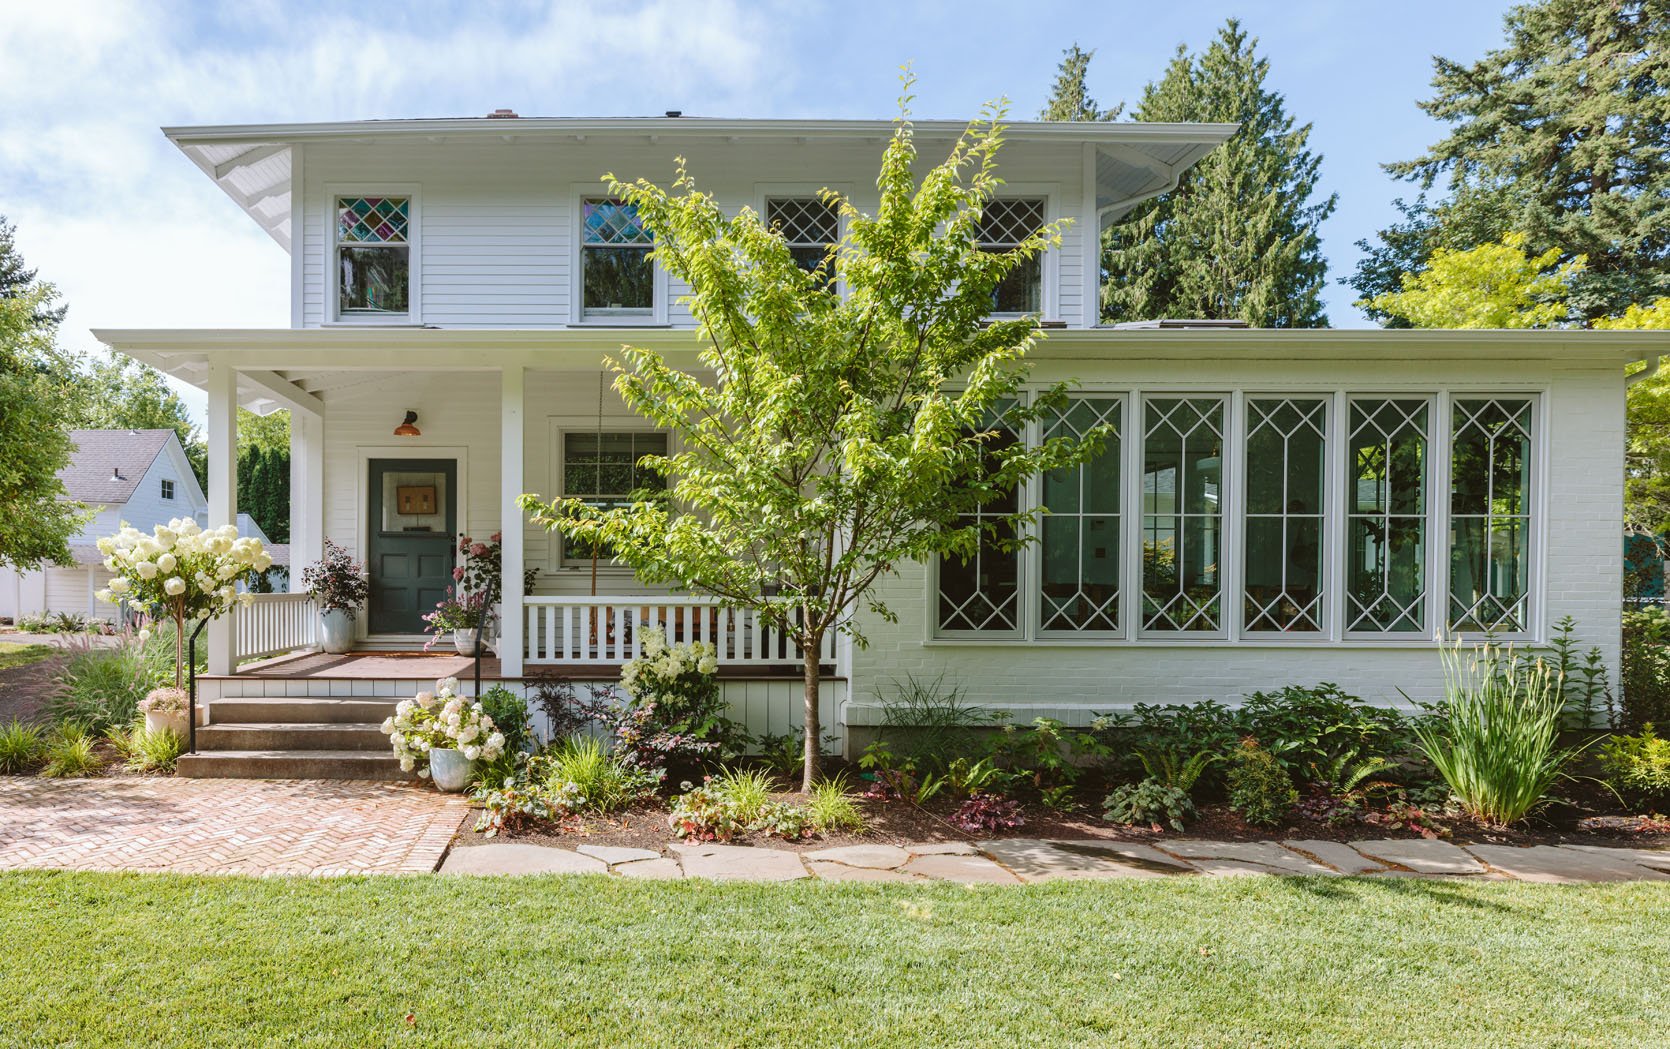
The other day I realized that I have never shown you the perfect front of the house. arciform – My goodness, do they know how to nail classic designs so well? ). It’s hard to not be impressed by how cute this view is whenever I drive or whenever anyone does (it’s way more like an adult home than I imagined). But it was not always beautiful or attractive. Like many 100-year-old homes, it started out as simple/basic, and over the years people have called for repairs and decisions. So today, I’m very excited to explain to you what it looks like when we buy it, what we’ve done to make it this classic and charming home we have now (and what we haven’t added yet when our budget arrives magically, ha ha).
All of this was everything we knew, and we needed help with the house and curb appeal…
…And these were all we did to achieve it 🙂 Read everything about it now!
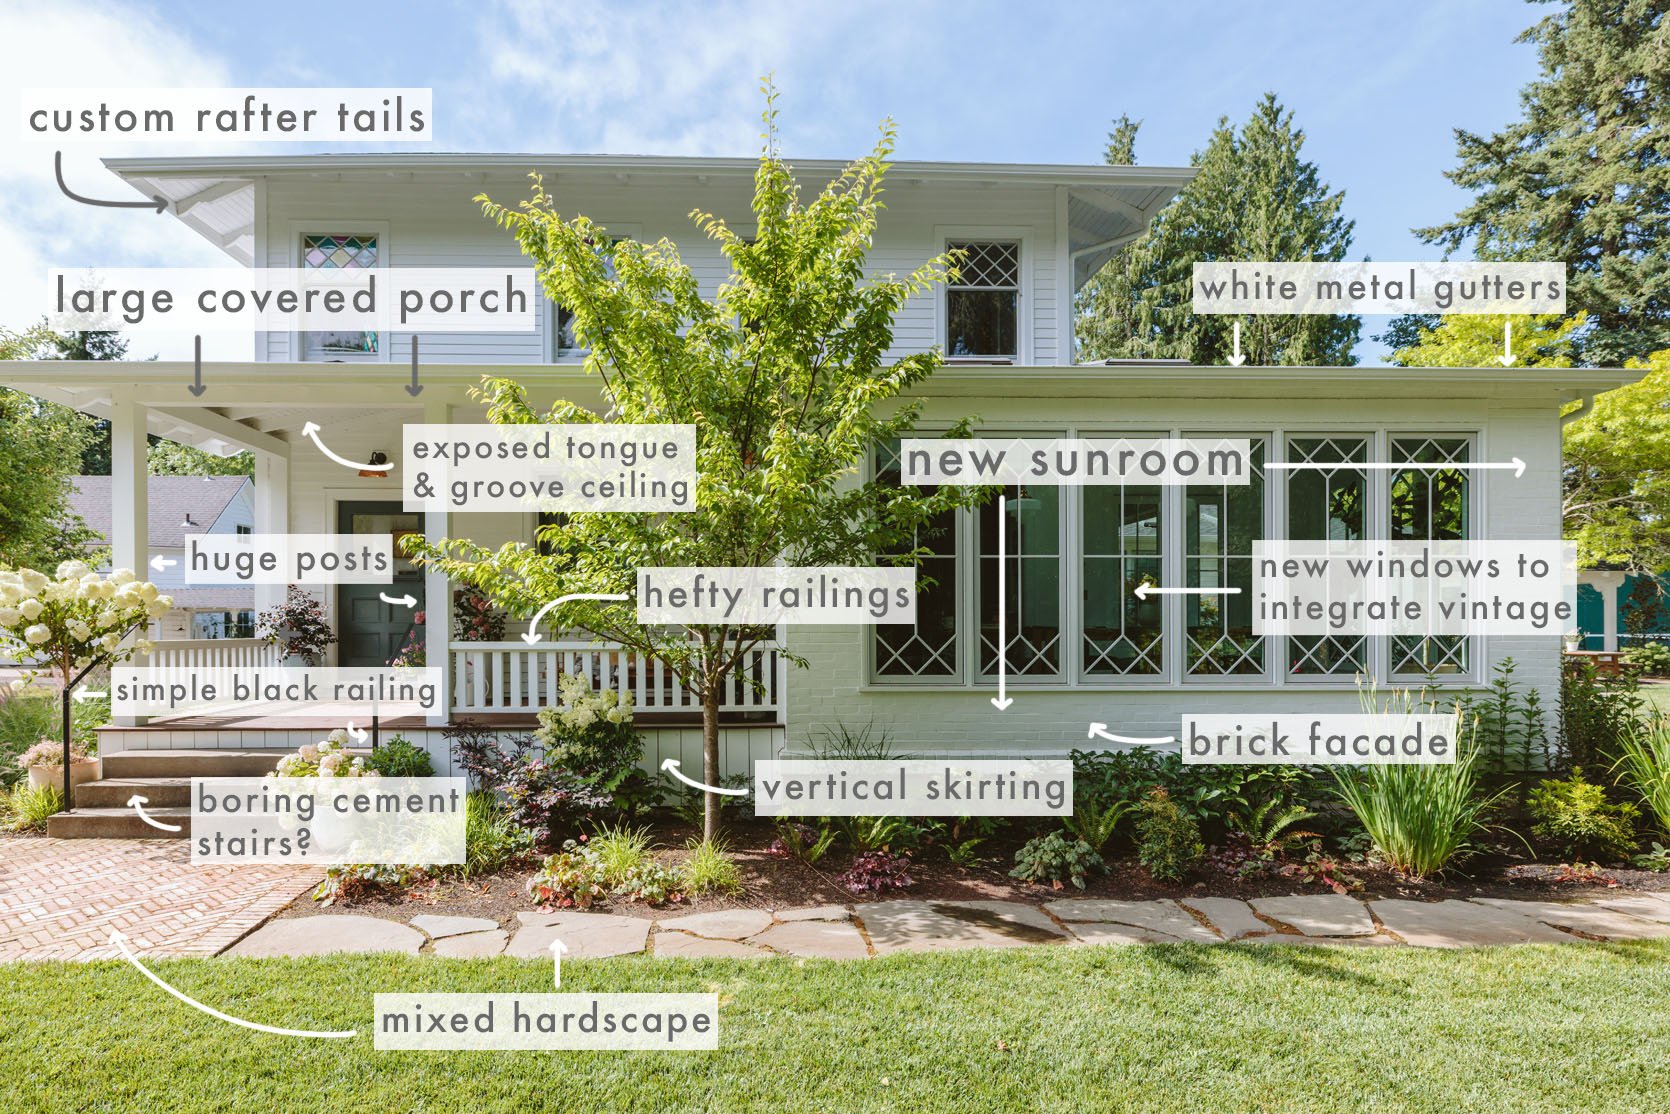
Added – New Sunroom
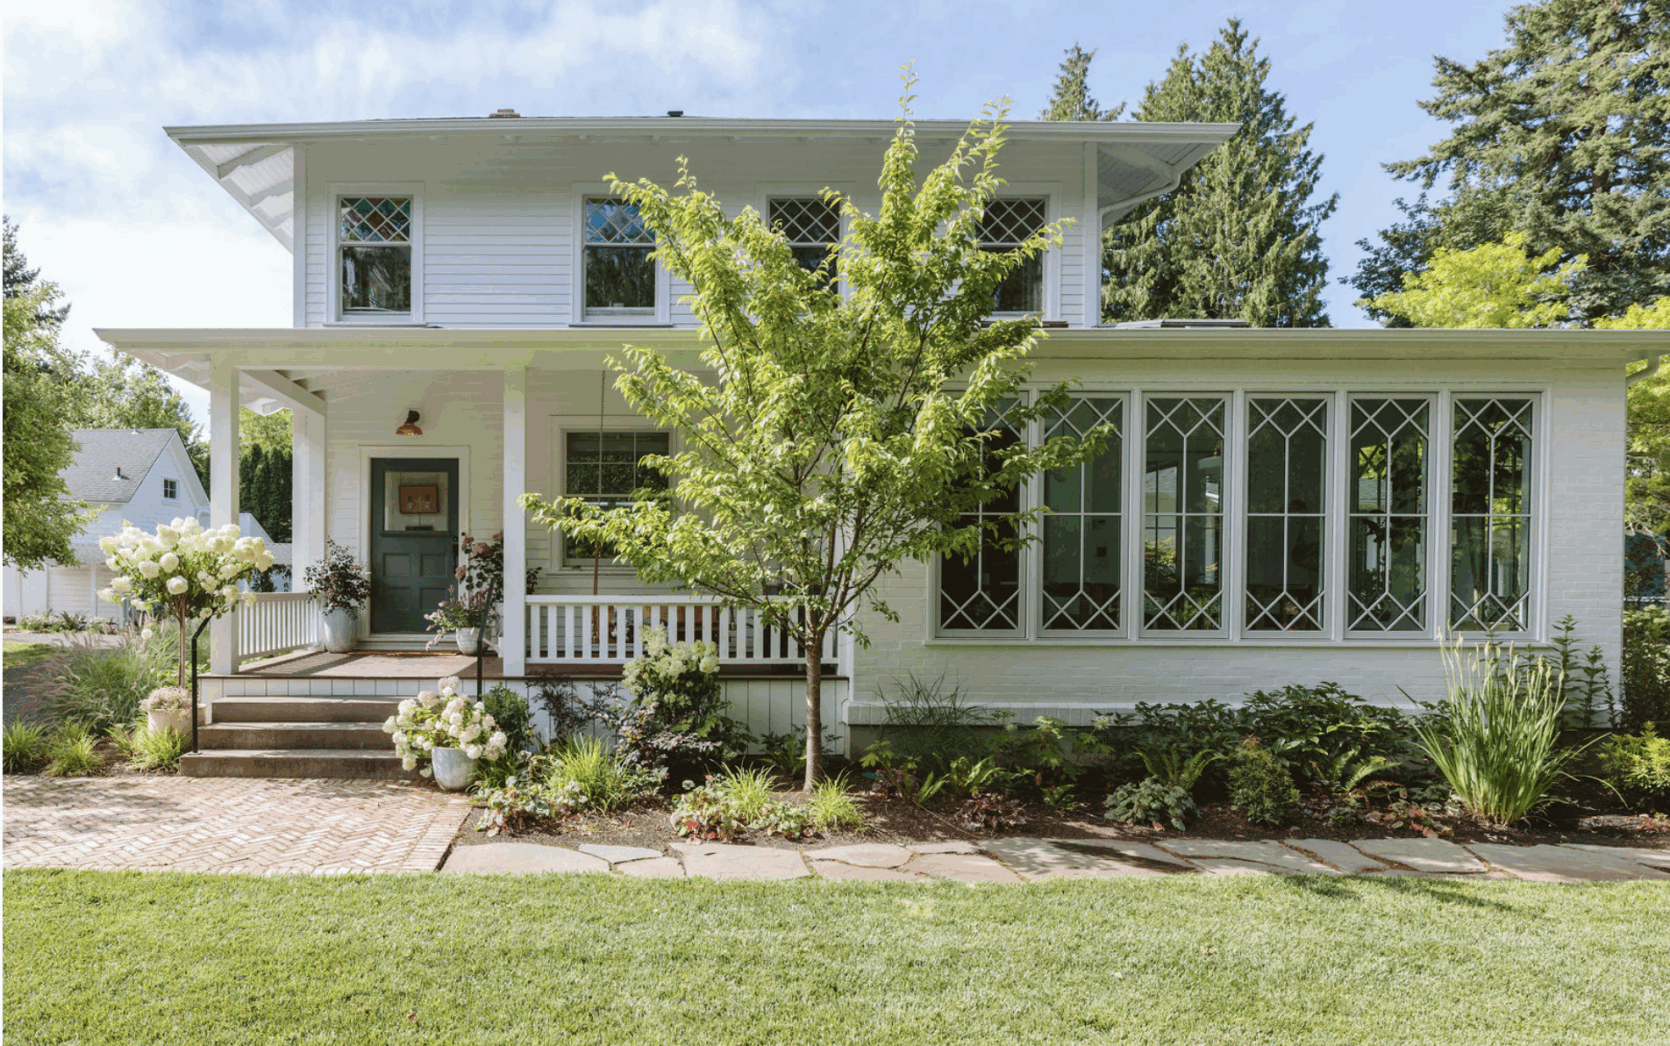
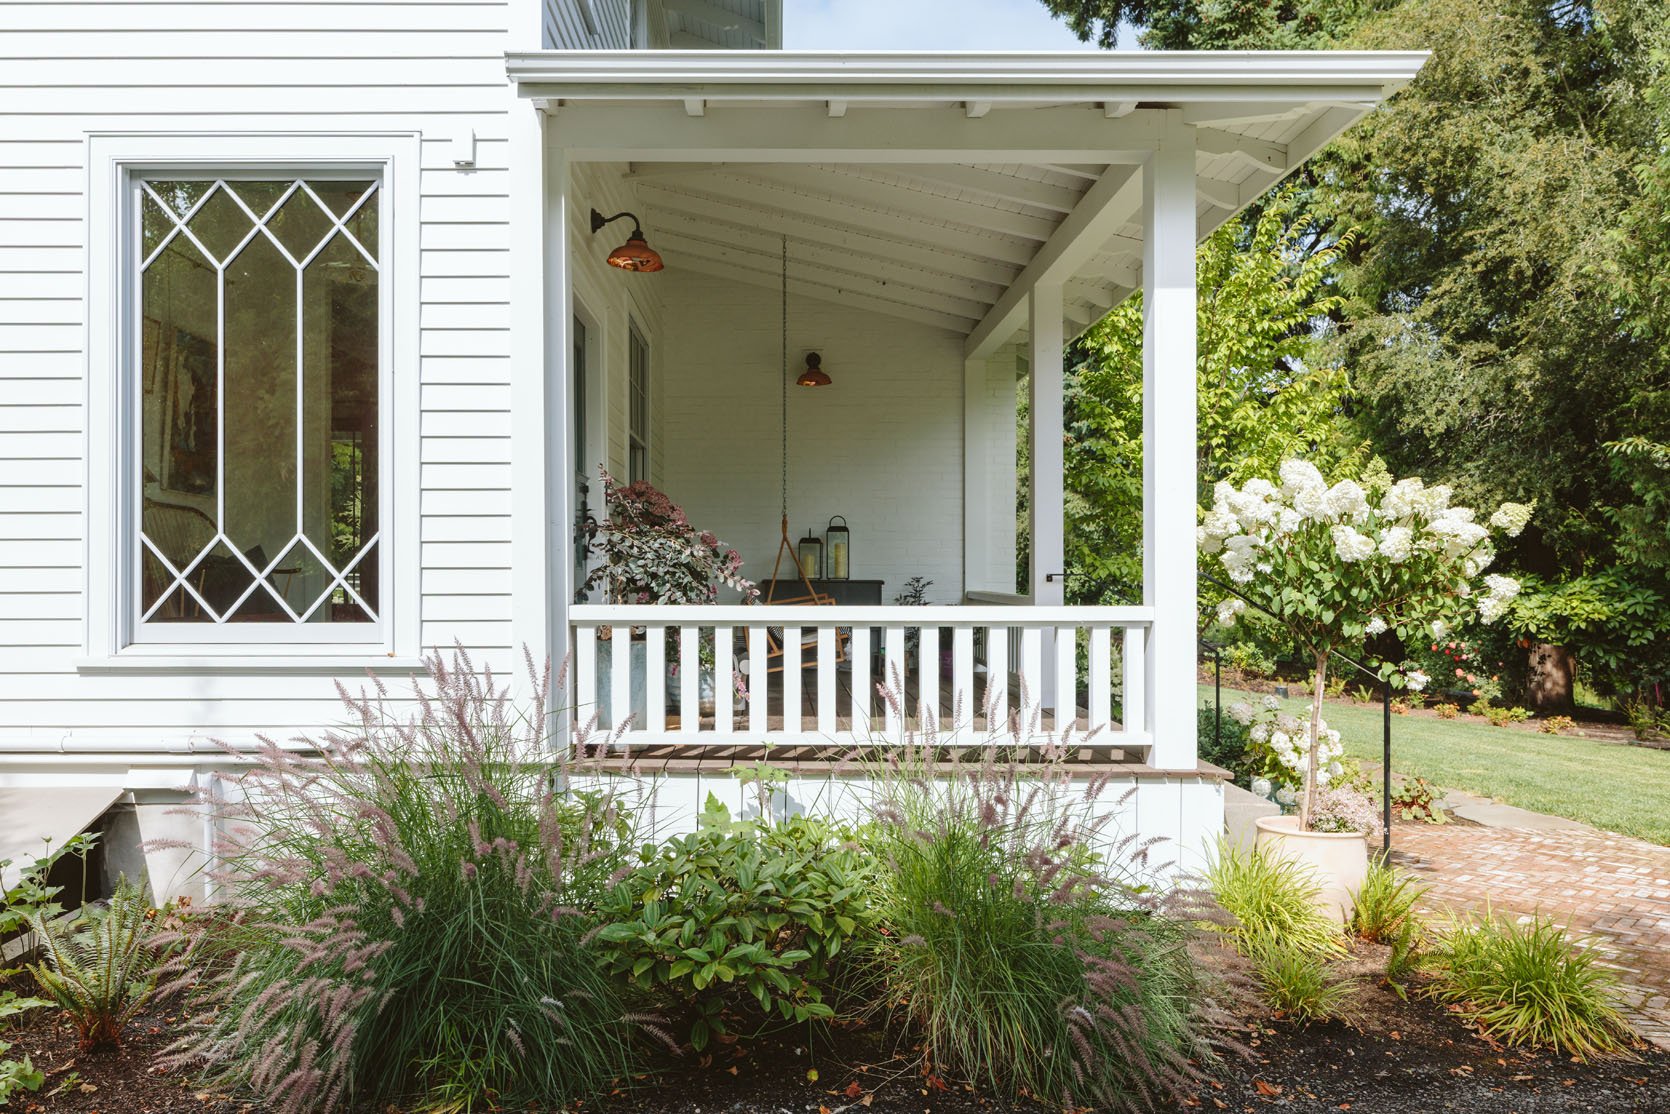
First off, Arciform designed my beloved sunroom so that the house looked like a wraparound covered porch. It’s incredibly original. Thank you, Anne! The house is absolutely fantastic, with a classic 4 square meters (the main living area is on the first floor and all the bedrooms listed above). Of course, they had added wings in the 60s, so that’s already changed style, but adding a solarium gave off a sense of this wraparound pouch.
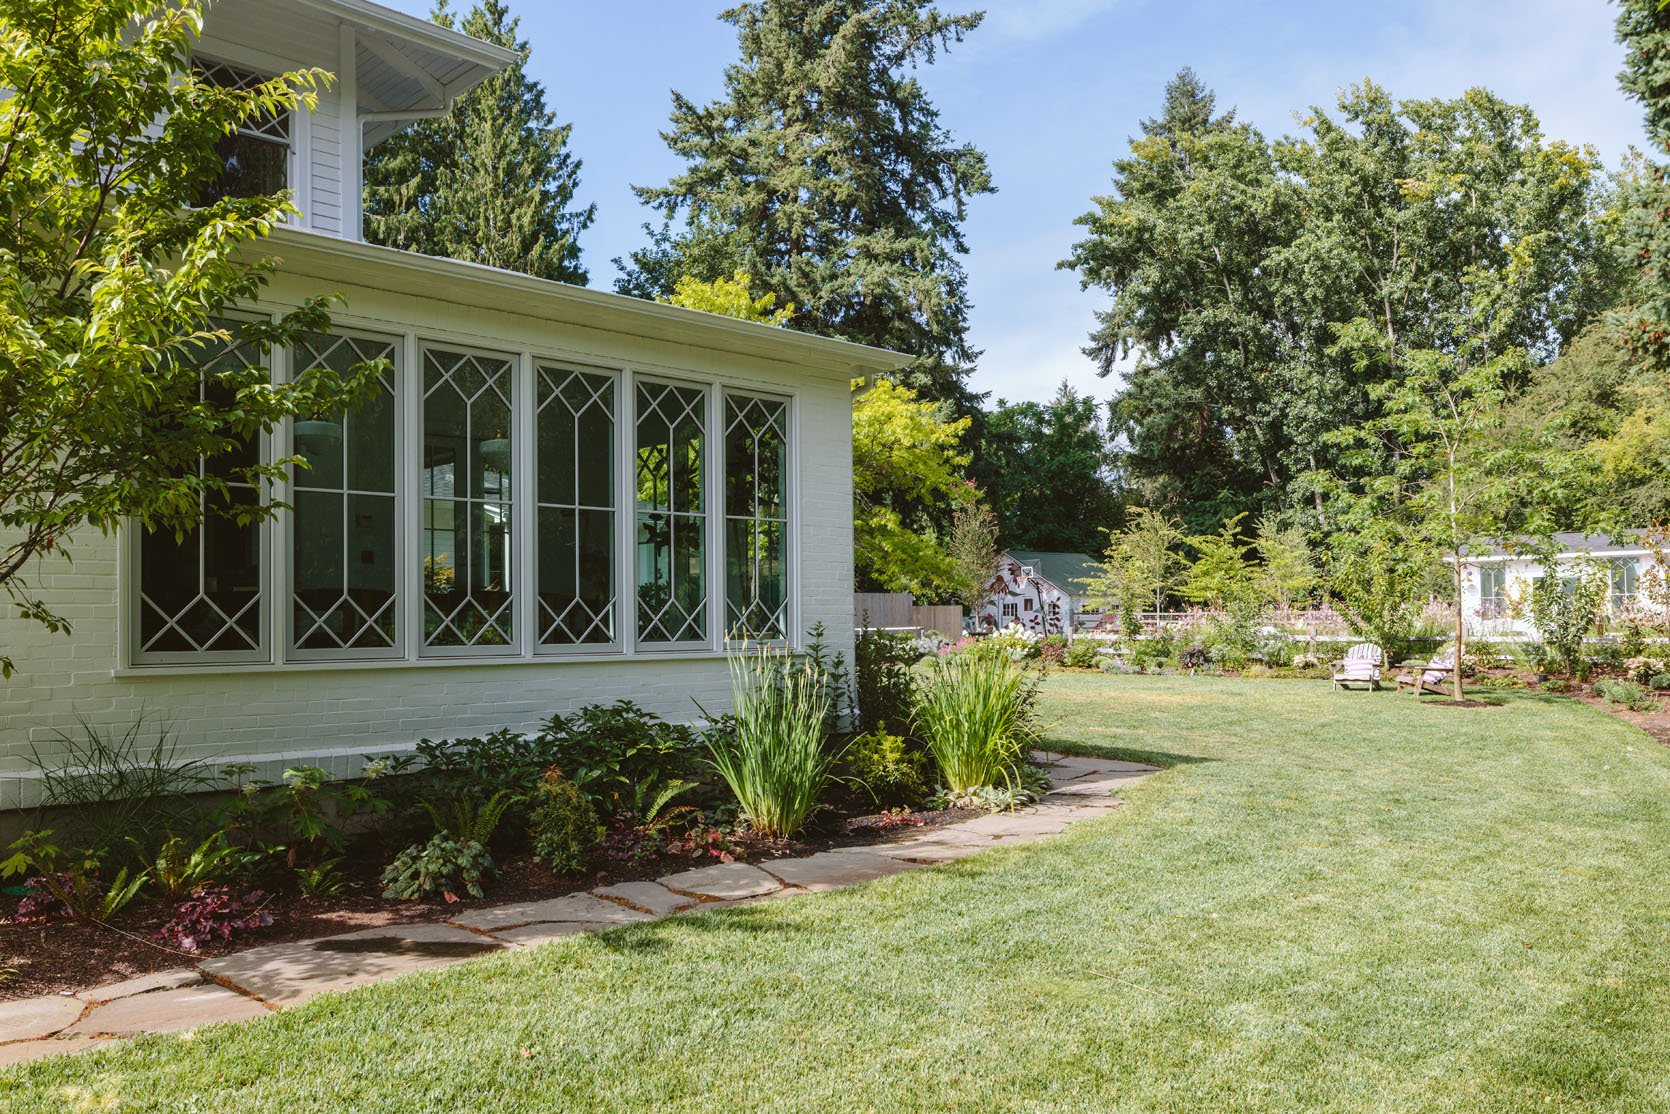
I designed it Sunroom window Married to a new classic grid and original diamond window (2nd floor). The only reason I didn’t run all these new windows was due to design and budget constraints. The windows in the sunroom are absolutely gorgeous and I personally think about it. So customizing these and the entry window feels like the right move.
Large pouch handrail
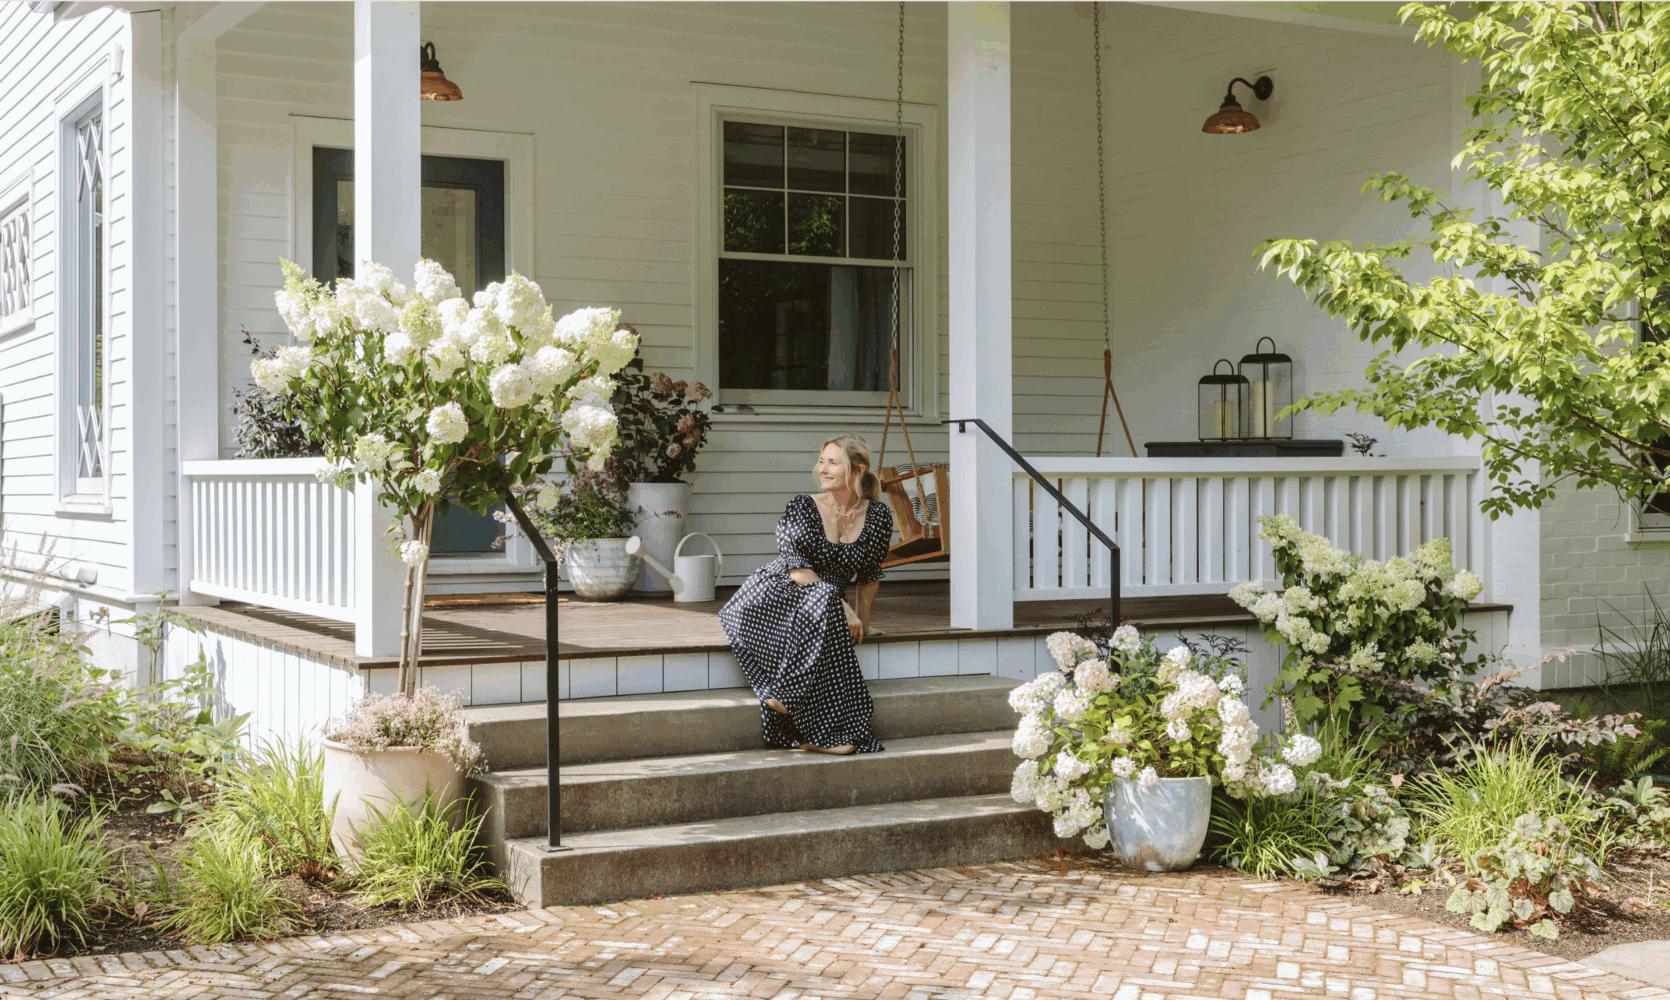
We went around the porch railing. The classic white wooden handrails felt basically and dared me to tell them they were boring, but I couldn’t find any meaningful alternatives (it wasn’t custom welding metal work). In the end, I believed Arciform that this was the right thing to do for the age and style of the house. As for size, I wanted a height that people could rest their butts (we landed at a height of 28 inches), but I thought these were too thick, thick and bulky. I was so wrong. Arciform kept telling me that on the size of the house, they needed a large post and a large handrail. They were right! I love how they look. The railings are on top of 6 inches wide and have a 3-inch vertical handrail and a 7-inch square post.
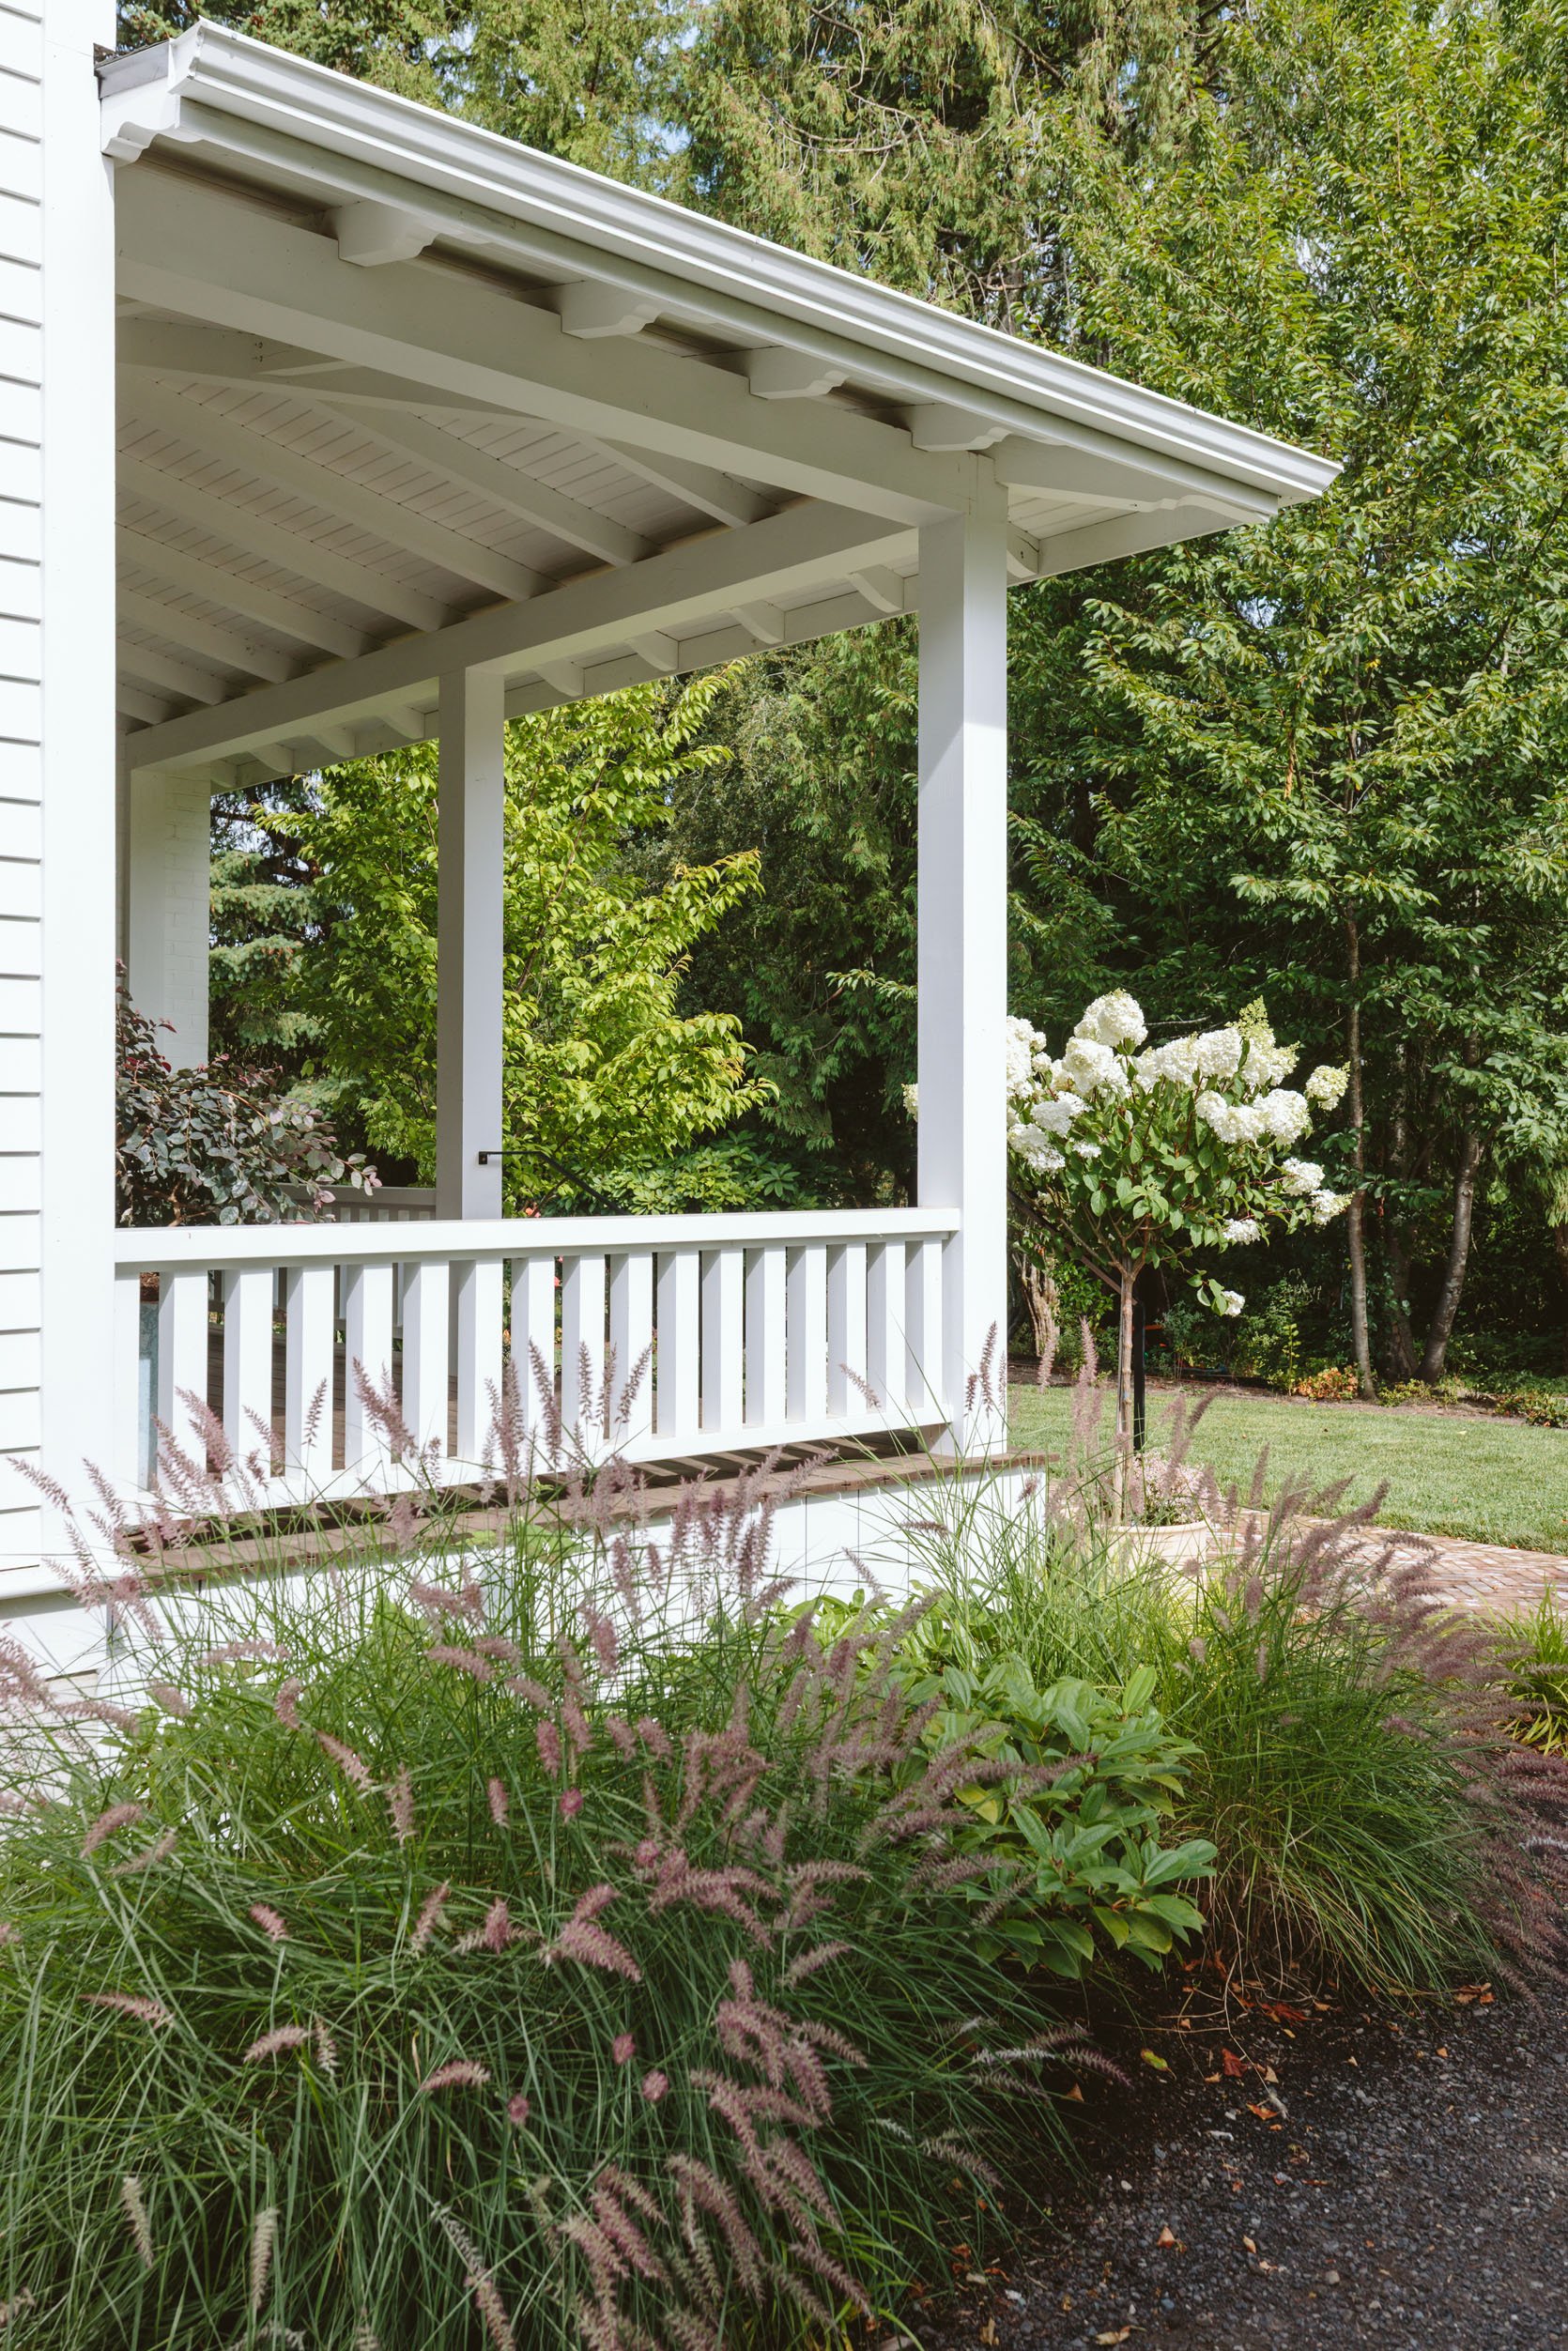
Ceiling beams and rafter tails
Thanks to Arciform, I learned a ton of classic pouches. We chose a tongue and groove ceiling with beams 18 inches apart. The custom rafter tail was matched to the original roofline rafter tail (I tried to replicate it with a gazebo but priced stakes – $$$$$). The rather carved details at the end are of course gorgeous, but very expensive. Here you need to do it to match. Now I thought we were leaving these rafter tails exposed (so we see them from the front of the house so the grooves are above them), but they were covered in pieces of wood (does it slip when they’re there too? Ultimately, I wasn’t trying to do it again on them, but it was what initially hindered me. They respected the grooves worked much better this way, and the rain in Portland that I wanted the best water management here. Now I’m getting used to it, but maybe the exposed rafter tails were all too busy with the whole property? If you want to see what I’m talking about, just google “Rowtosed Rafter Tails” into Google. That’s a different look.
Cement stairs and black metal handrails

Another detail I sweated was the cement stairs and black railings. We were told many times that we cannot keep wood or wooden stairs that are exposed to the rain. So I watched Pinterest for hours/days/weeks of things that can be used that are not wood, and I found crazy decorative custom staff (too much $$$) or simple/borey. I was overwhelmed and overwhelmed so I designed it to be thin and wide and wanted them to just leave. I wanted these didn’t have to be anything special as the house was very clean. Thank God, I was right about this, so they were simple, but they still cost thousands of dollars as we needed 10 people around the house at all entrances/exits (codes). Same as cement stairs – cement is so boring! But we had so many entrances (front door, mudroom, bedroom, kitchen) that we really couldn’t do bricks or anything special for a budget. Imagine choosing to do real masonry, as cement was only $10,000. These are things you don’t notice. The house is very clean and these simple and classic elements disappear in a good way.
Vertical wood skirt + horizontal siding
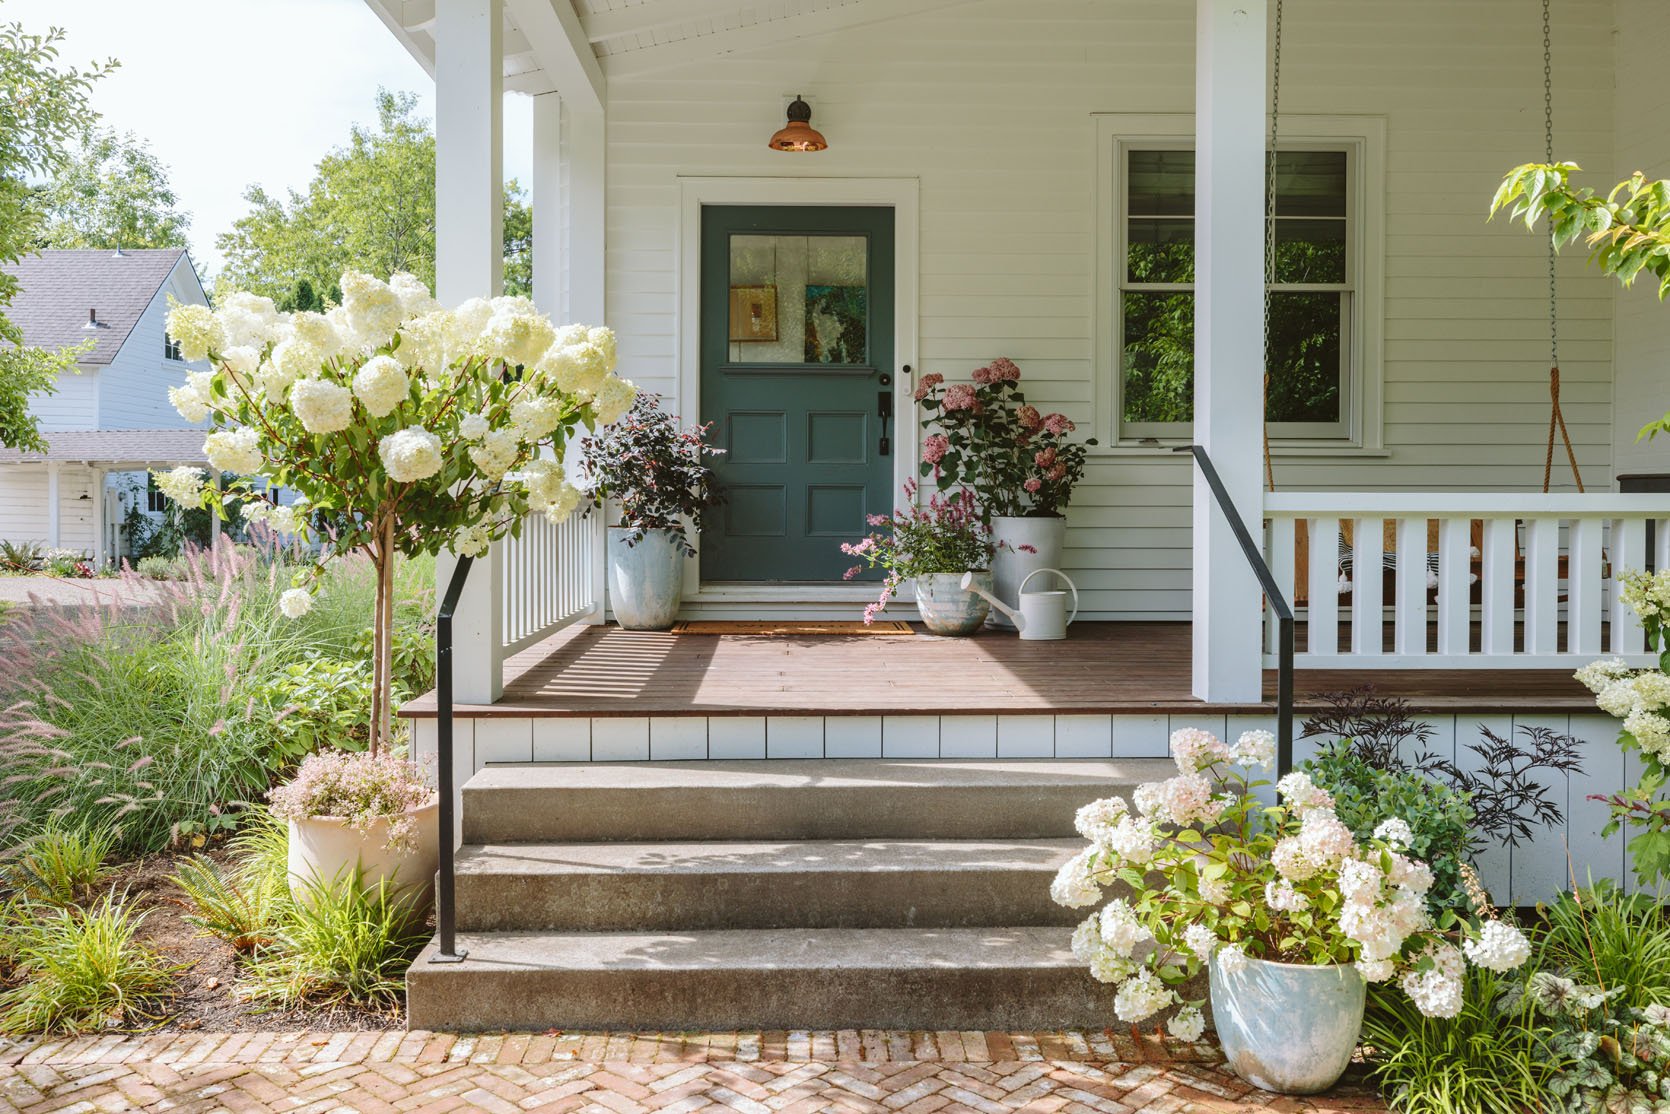
I chose the real wrap siding (not a hardy board). This was more authentic, so I garaged it on a hardy board and could hardly convey the difference. Our siding is a 5-inch reveal (so I think it’s a 6-inch lap siding that has the top of the first inch covered with the next board). Super classic. Well, the vertical slip under the pouch threw me first, but it makes sense as it contrasts well with horizontal siding.
What about copper grooves?
Ah, you must have thought of copper grooves, but the difference in price was pretty nutty. I certainly don’t remember now, but I think our white vinyl groove was about $5,000 and the copper groove was $30,000 (or something like that – a crazy difference). And the more we think about it, the more we actually felt that our bright White House didn’t want a copper groove. I love seeing them love Julia’s house in Chris (and they broke the process so well). But for our White House, don’t realise that the ditch is really working. Of course, copper candelabras really pop in the way I love (and I love how they work very well with brick landing pads, which are architectural callbacks to kitchen patios).
Mix the hard scapes of stone and bricks
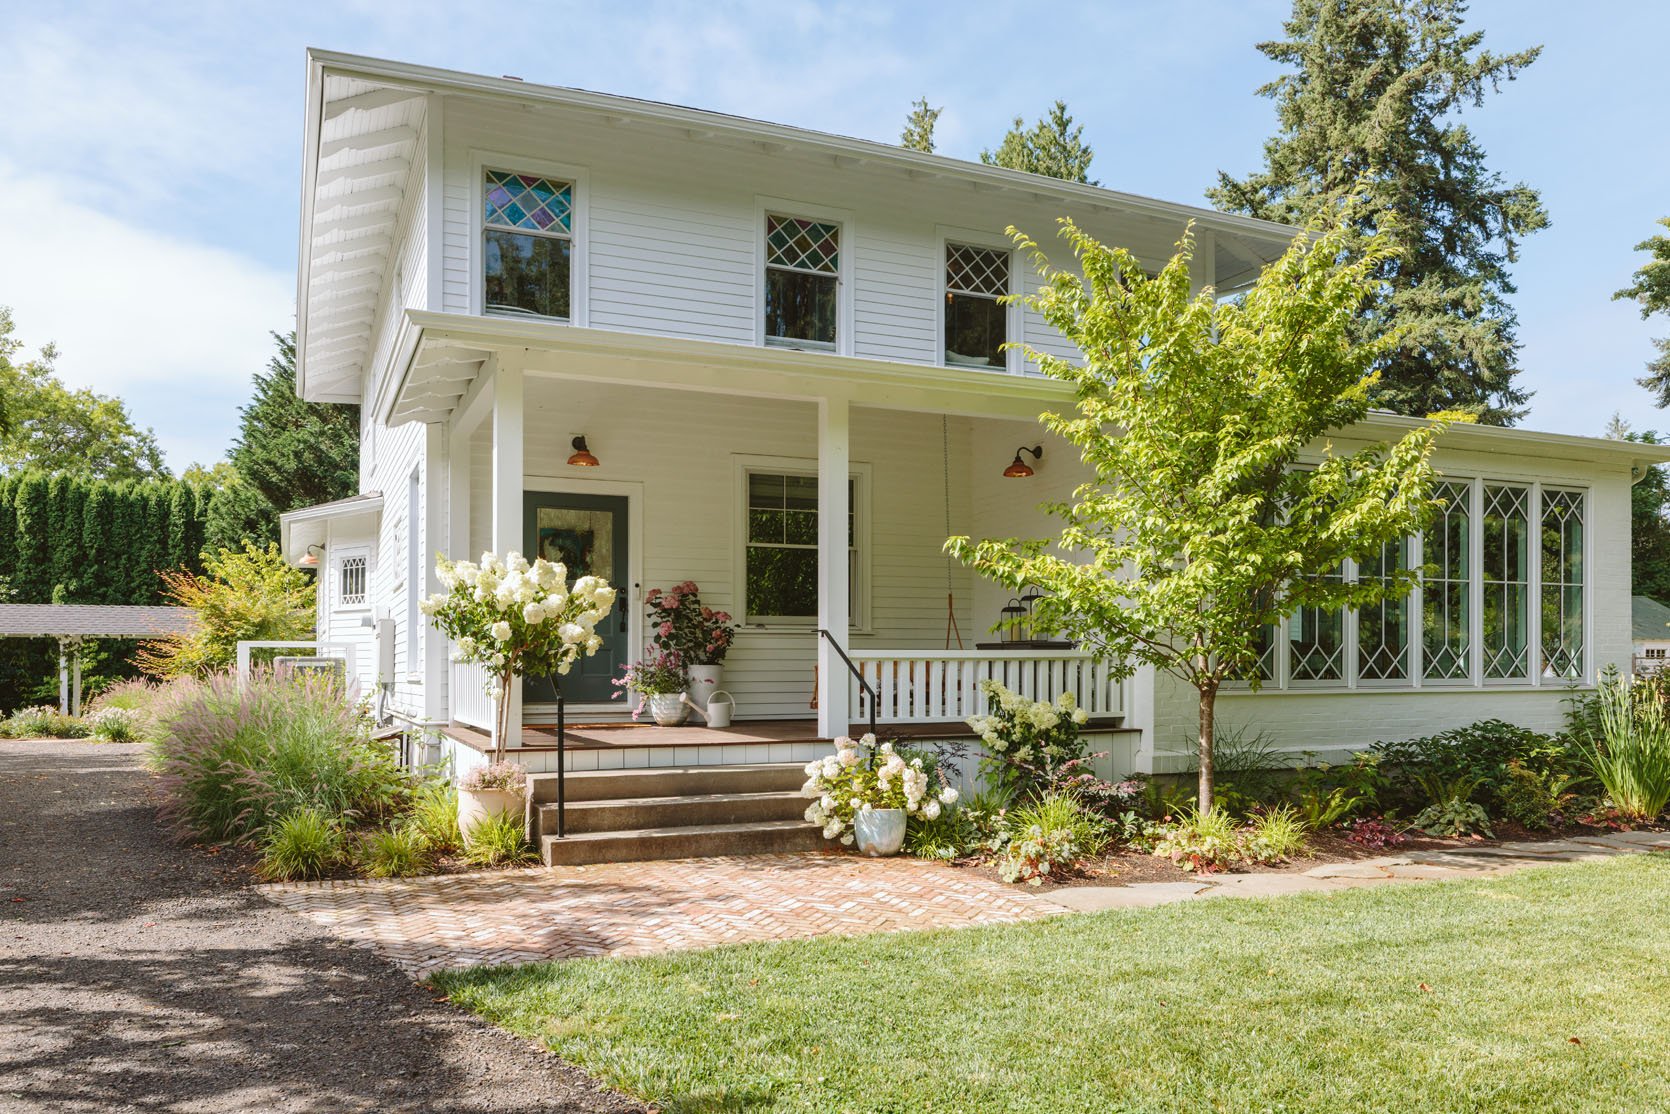

Hardscapes get complicated, but why we did herringbone bricks Anywhere First of all, there is a covered passageway on the north side of the house, and it is long and narrow. I felt it had to be a linear pattern (not organic as grey). And doing the rectangular gray lot didn’t sound enough for me. The reason we didn’t do herringbone bricks everywhere was due to the extreme cost of both the material and installation (though we say a lot, as stones are also shockingly expensive). So we decided to mix up the finish – more formal herringbone bricks and casual/russy bluestone. My philosophy was that in an older house like us there is something appealing about how all the finishes aren’t aligned or the same. My feelings are, over time, people from different eras have been added to different style choices, and as long as they are all high quality and well executed, that hodgepodgeness is actually attractive and collected over time. I think it’s right This houseBut I didn’t do this for a modern home – I would probably curate all the hard finishes with some custom details, but I don’t do an organic flag next to herringbone bricks everywhere.
Landscape

The house is gorgeous, but still simple (white on white, with copper/brick pops, but nothing whimsical). Sometimes I was worried that it would get boring (was the windows color? Is the trim color? Is the whole house color?), but I continued to remind myself that as the landscaping grows, it is surrounded by different tones of green and dark auber hair/pink. Kari (Studio Campo) We originally chose plants/trees here, but they have already changed a lot since their installation (Amarlylis just appeared this year and should probably remove them before they take over). Moisturization has been added from Dennis 7 Dees), but the statement of cherry trees (thanks) Today’s big tree (Oregon) And all the plants really added lots of colour.
Two things I want to add (finally)
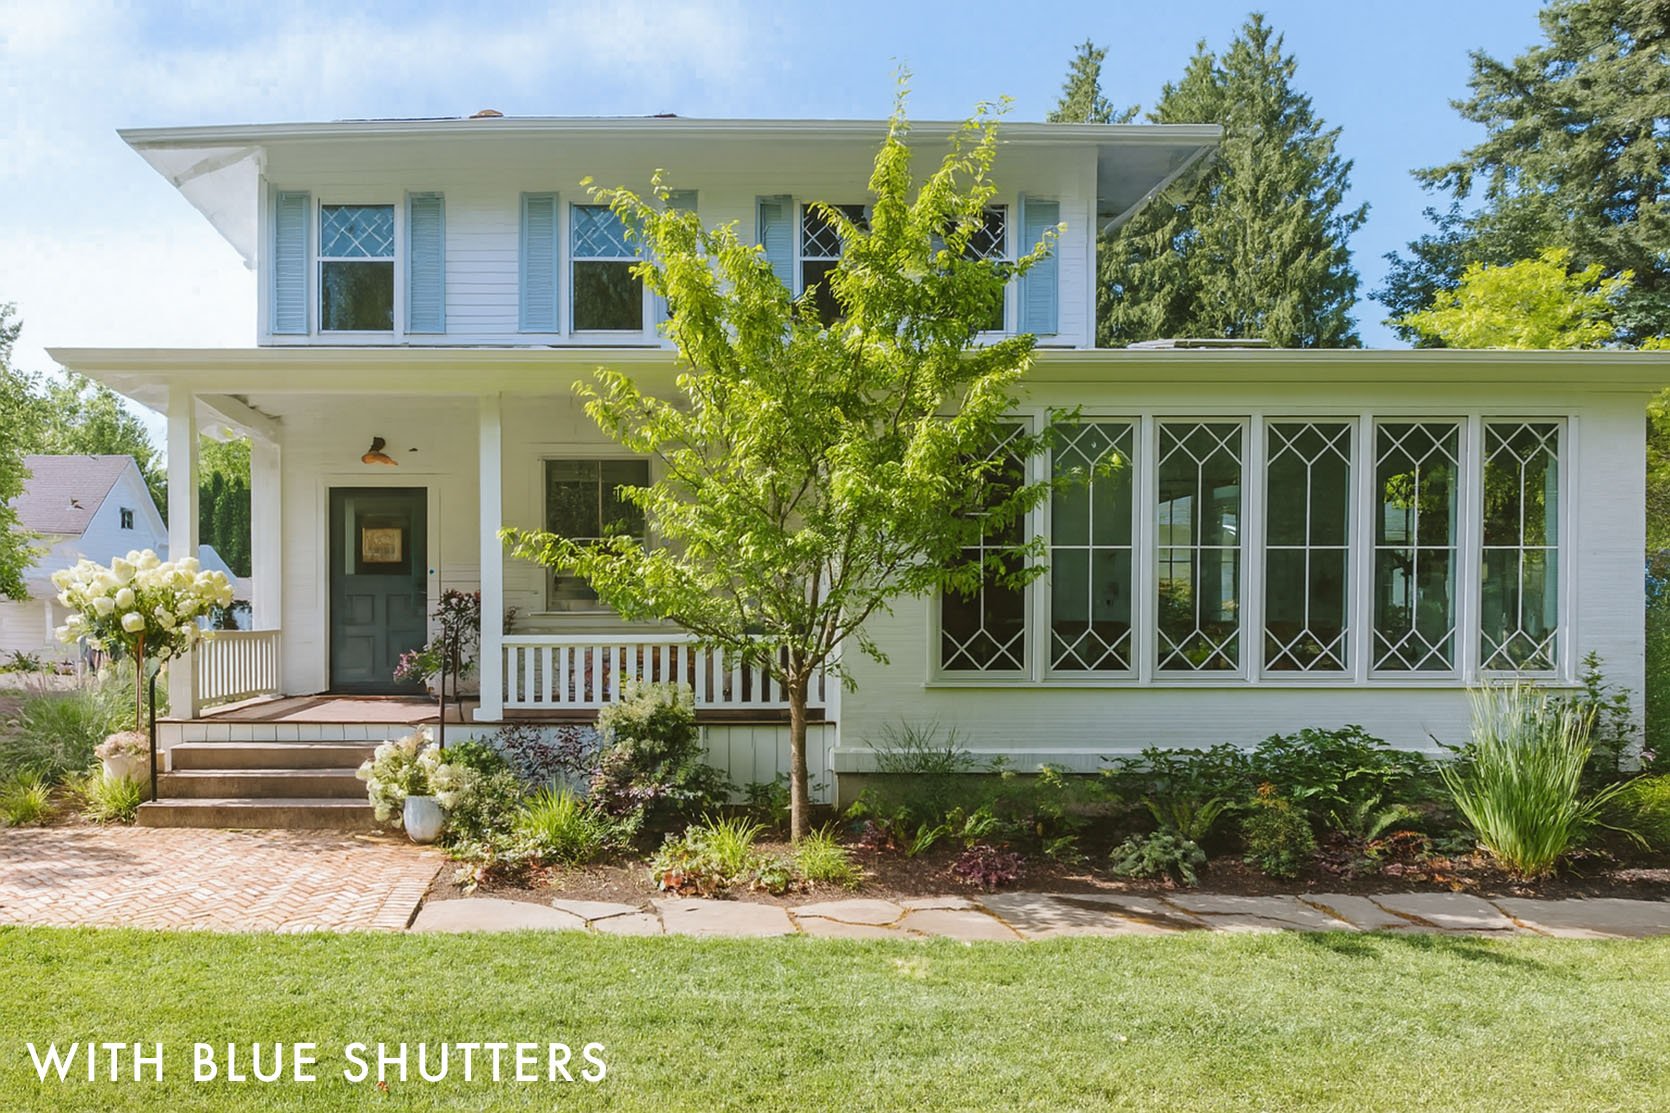
I really love our home. But if you can snap your fingers and add two things, you’ll add a blue shutter to the second floor of the bedroom and to the custom corbel (as you did with the gazebo). I know we were turning the shutters here, and although it was very polarized, I really think this house can handle real shutters (not the renderings of these, they are the right size and real).Sherwin-Williams Dutch Tile Blue). And it’s not unusual to put them only on the second/bedroom floor (as they hardly work any of the first floor windows). When I quoted earlier they were $25k (!!!) and I was on the fence so we didn’t do it. But we hope to have them, and I might play the lottery and go for it 🙂
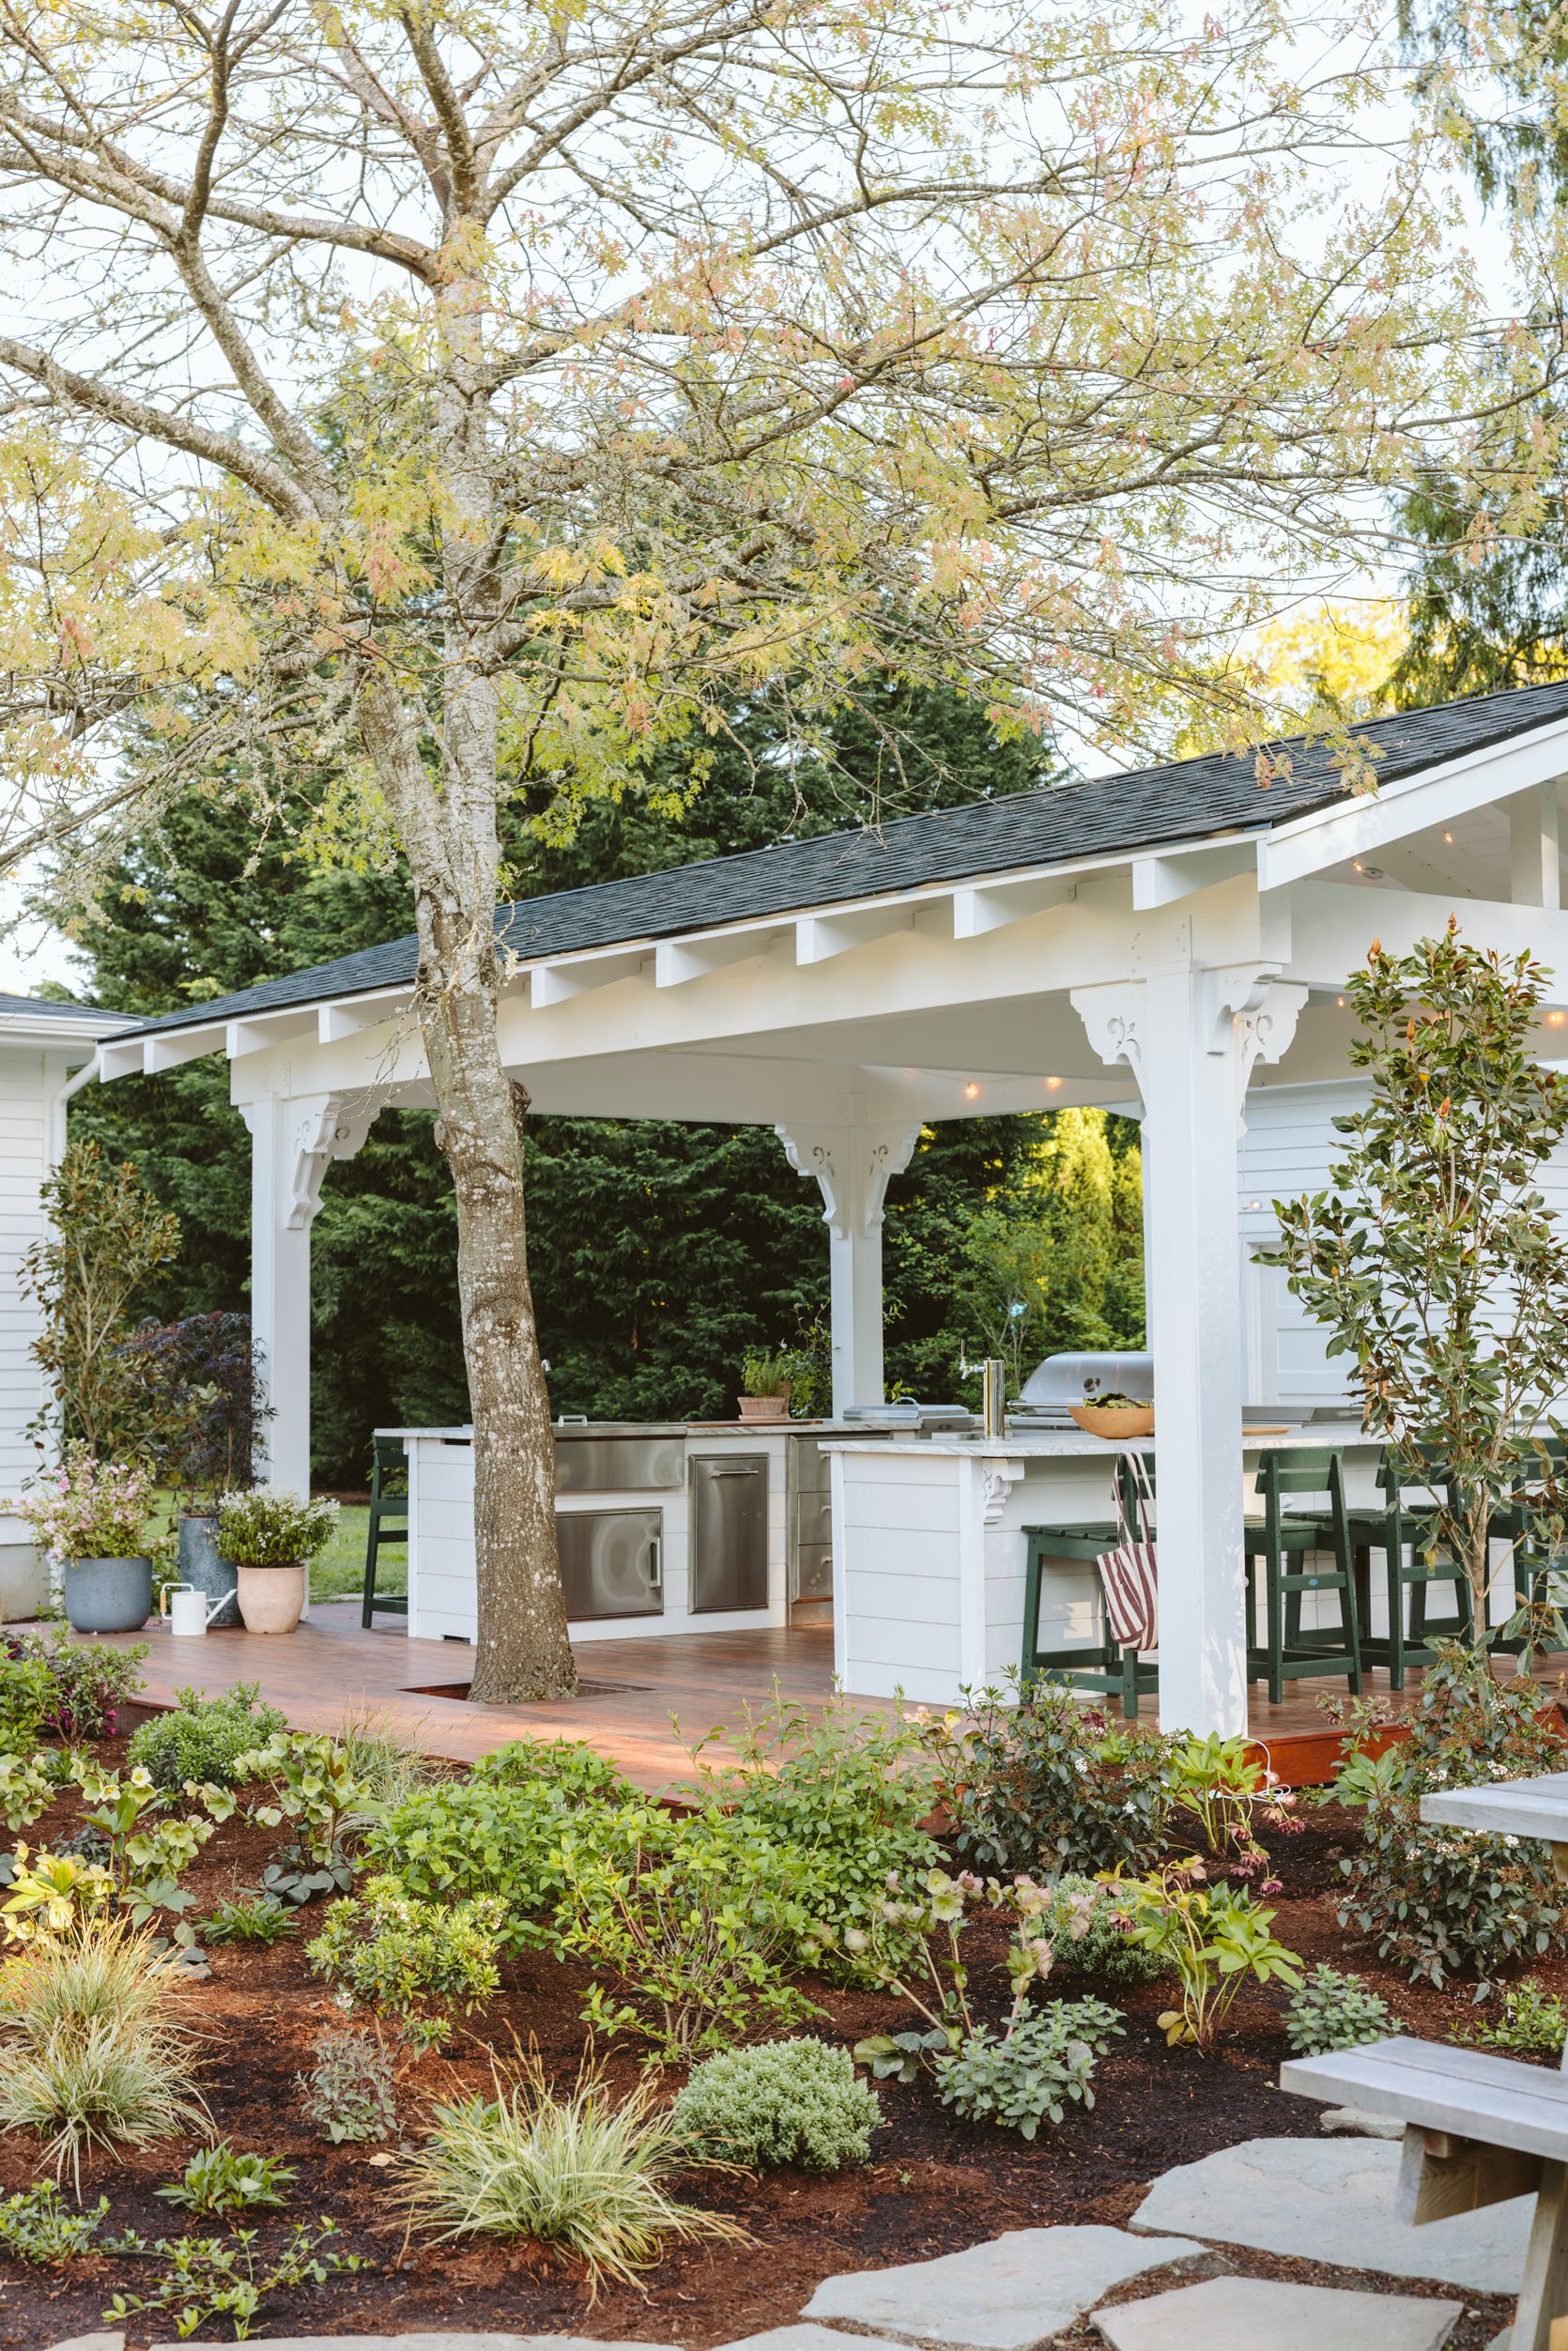
And once again, Purl made the most beautiful Corbel for our Gazebo, so I hire him to add it to the pouch (each + install + install, so it’s not just architecturally valuable).
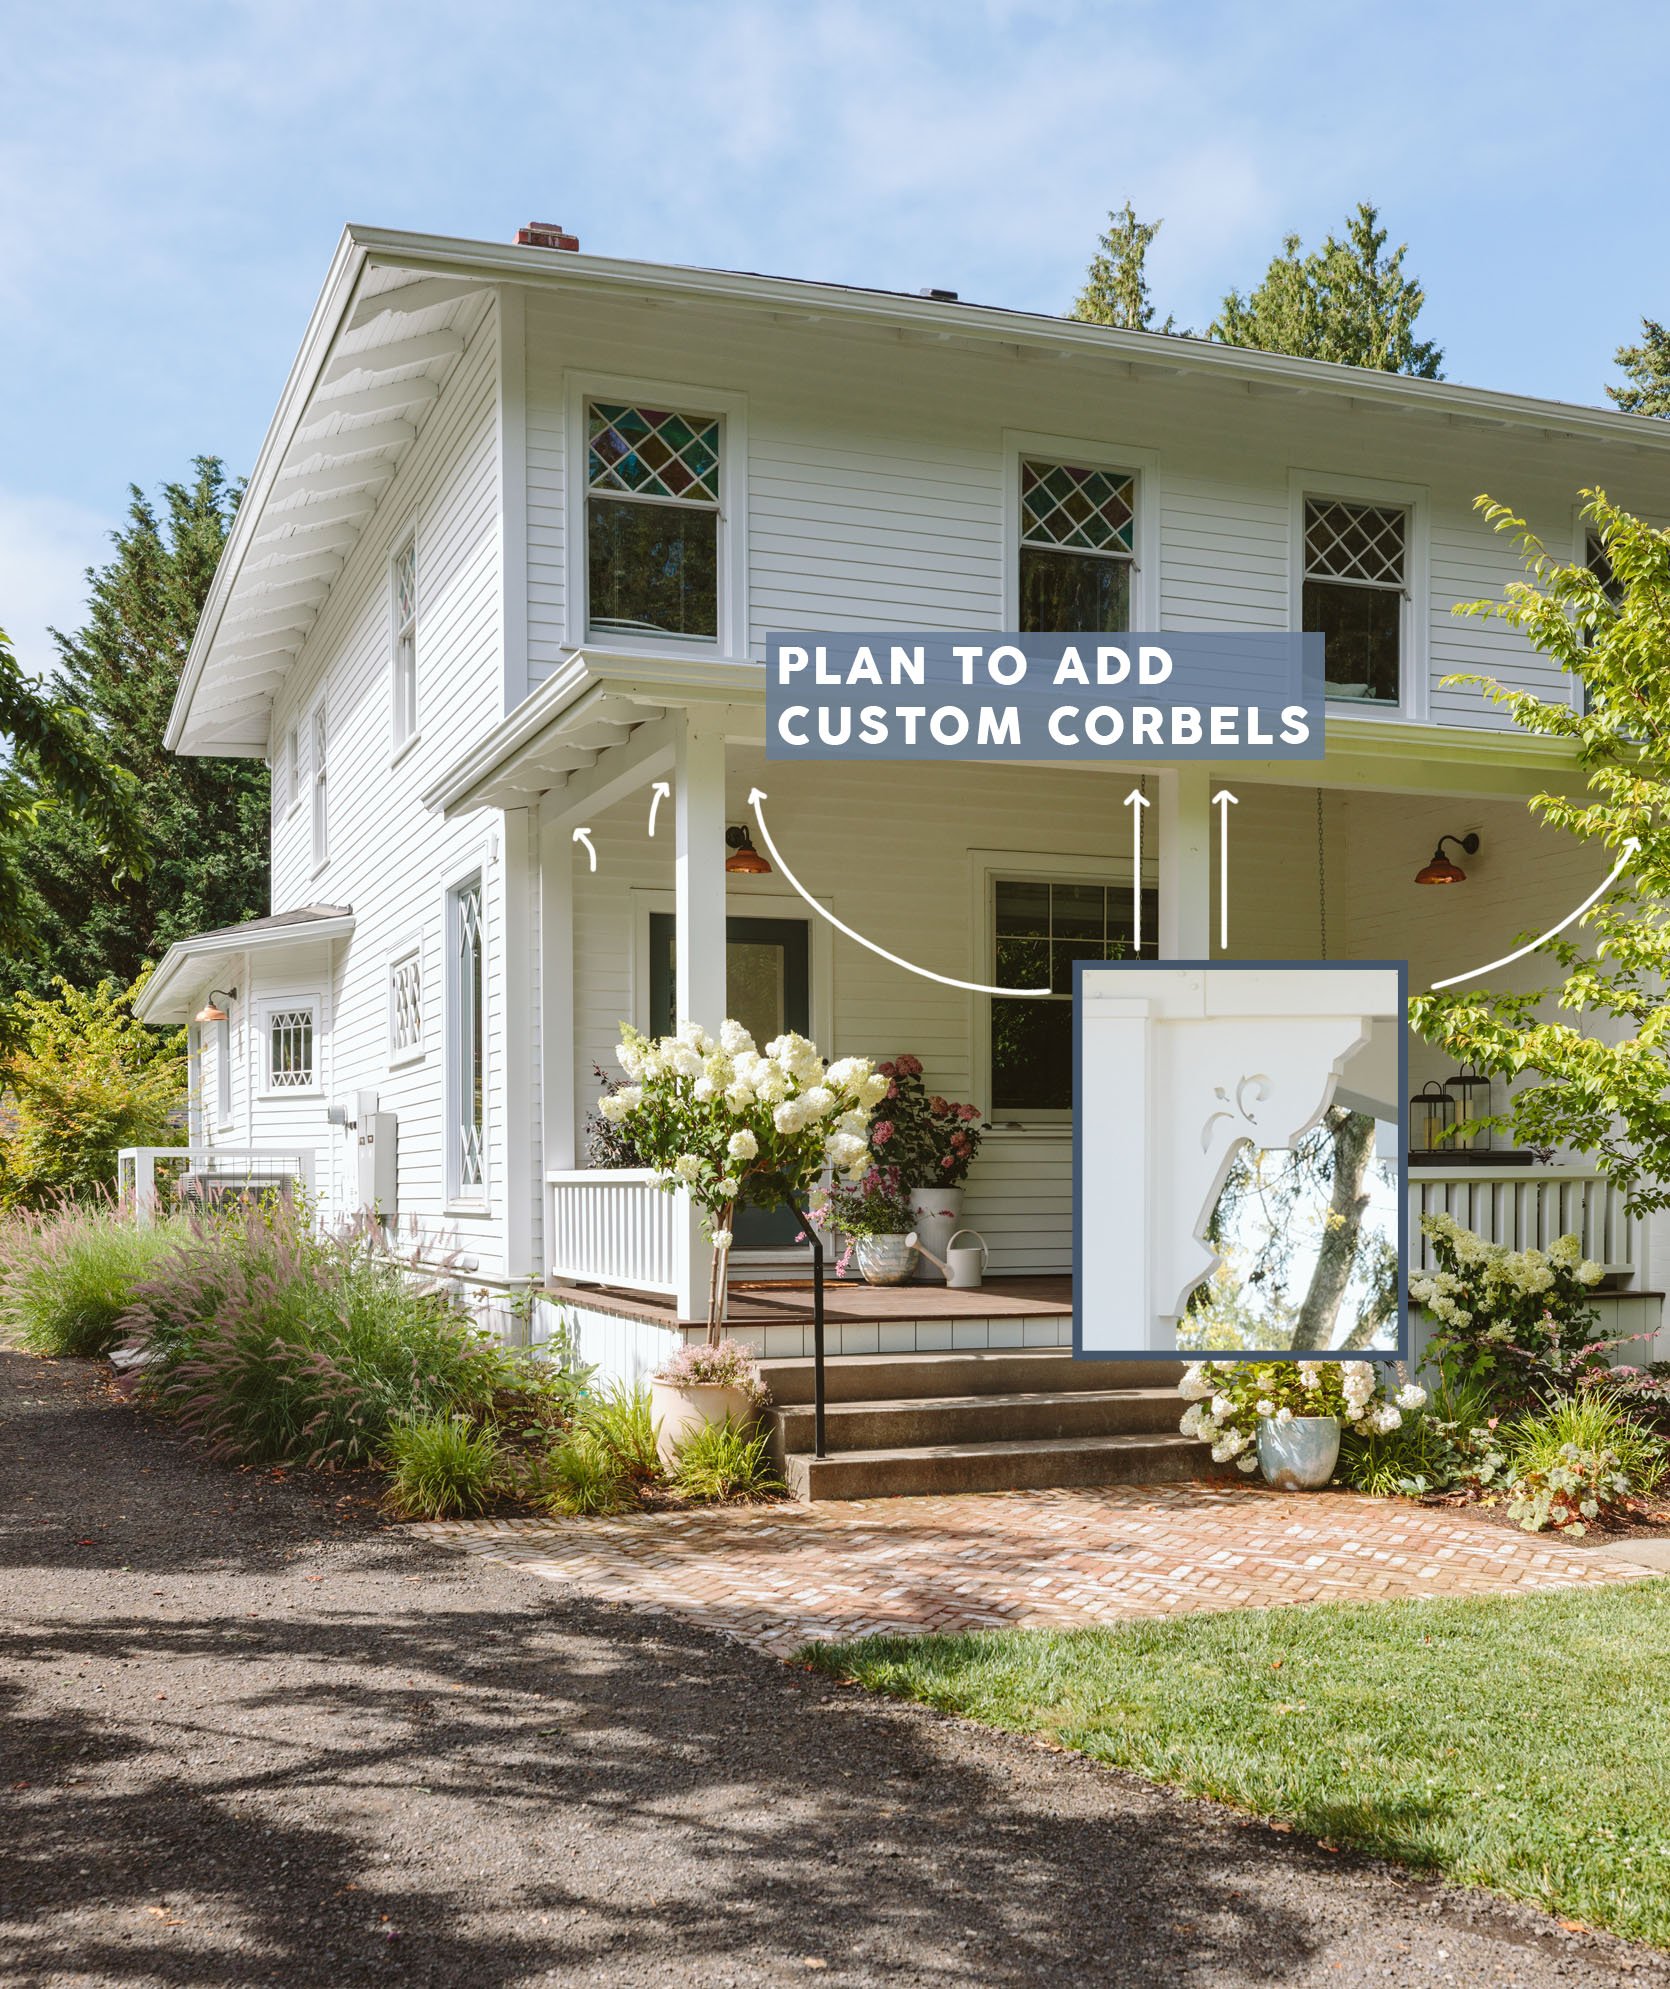
Anyway, see if you’re coming closer to one of these things (financially and timely). Corbel makes it easier to do (and I love supporting Purl and his artwork), but the shutter feels like a lot. I have fish to fry other fish (i.e., carriage house to restore). thank you, arciformto help us make such classic decisions about the architecture of our homes. Everyone thinks the front is original and it’s hard to believe we didn’t have a pouch or a sunroom. Please ask in the comments!!

*design arciform Emily Henderson (me!)
**photograph Caitlyn Green
Source: Emily Henderson – stylebyemilyhenderson.com

